Create an Insider List
To create an insider list, start by opening the Insider List module in the left-hand menu.
- Hover over Create at the very top and select New insider list
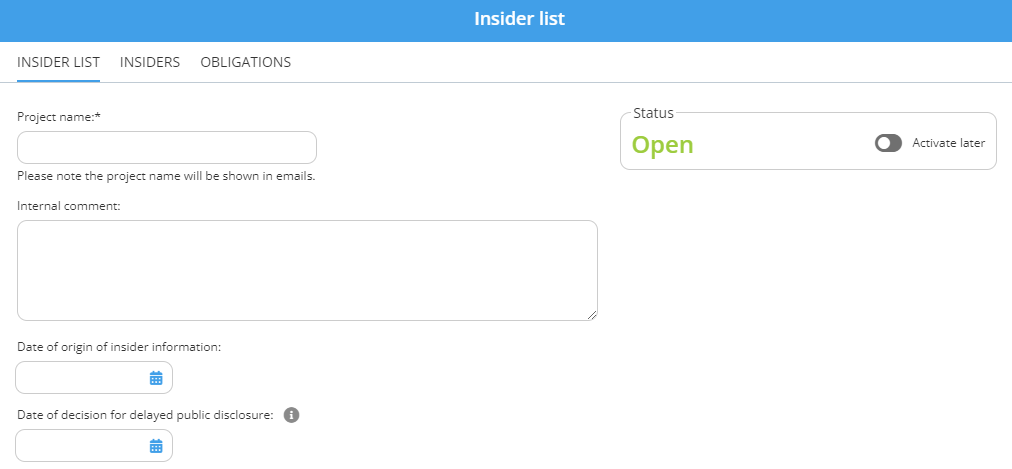
- Add Project name (mandatory). The internal comment-field below can be added to add aditional information regarding the project.
- Under Status, you can select Activate later to set a date and time when the list should be activated. No emails will be sent to insiders until the insider list is activated.
- Add dates for when the information originated and when the decision was made to delay public disclosure. These can also be added at a later stage.
- If decision support is enabled, make sure to tick the box to ensure that all conditions have been met.
- Proceed to tab Insiders (found at the very top).
- Select Add insiders and add either per person or group. Save.
- Add Function and reason, Keep own insider list as well as time and date of when the insider/s obtained the information. Insiders can be added to an open list at any point.
- Open tab Obligations for an overview and possibility to edit the obligations (fetched from your template).
- Save and send