FAQ Overview
Survey Manager
Recipients
To conduct a survey with unique respondents, they need to be added to the Recipients list found in the left-hand menu.
Edit groups can be selected to create and edit groups. Doing this can make the process of sending surveys more streamlined as you will be able to easily send to an entire group as opposed to selecting one by one.
Select Add person. Fill in all mandatory fields and select group if you would like to add the person to one. Save. To import many at once you will find the option to Import from CSV file. There is a template to download if you are unsure of the exact format.
Author: Lena Vartanian
Last update: 2023-01-16 10:22
Create Questionnaire
Questionnaire title and introduction.
Add the questionnaire's title at the very top. Below it you have the option to add an introduction to the questionnaire. Insert images, add links and format to your liking.
Messages
Add a footer message that will be displayed at the bottom of each page in the survey and personalise the thank you message which will be shown once a participant has answered all questions.
Settings
- Progress bar provides an overview of the survey and shows how far the participant has come.
- Section numbering should be enabled if you'd like the sections to be numbered.
- Anonymised survey as default will simply set Anonymous as the default setting when creating a survey. This can always be changed before sending a new survey.
- Show company logo will insert the logo on each page in the survey.
Scroll down to create and edit your questionnaire. You can at any point select Preview (from the module menu) to preview what the questionnaire will look like to those participating.

Author: Lena Vartanian
Last update: 2023-01-20 11:38
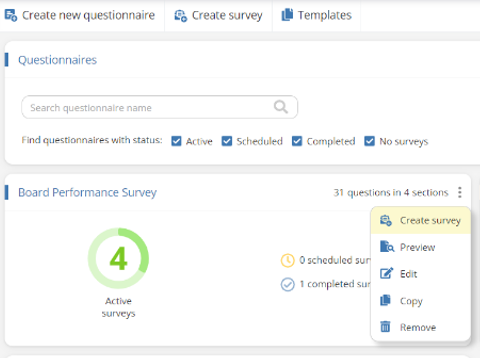
Create survey
To make a questionnaire available to participants you need to create a survey. You will find the option 'Create survey' in several places. Firstly in the Module menu next to Create questionnaire. Within each questionnaire you will also find the Create survey option.
Select whether you would like to create an open survey or add unique respondents. An open survey will simply generate a link which you may distribute as and where you please.
The Survey title will, by default, be the name of the questionnaire. It is recommended to add year and/or company name.
Select whether you would like to send now or schedule the survey. It is optional so add a date and time to close the survey. This can be done manually.
Click Add respondents to add unique respondents. These will be fetched either from the Members or respondents lists.
Toggle the switched under Advanced settings if you would like to create anonymous surveys, send an automatic reminder and/or receive notifications from the ongoing survey.

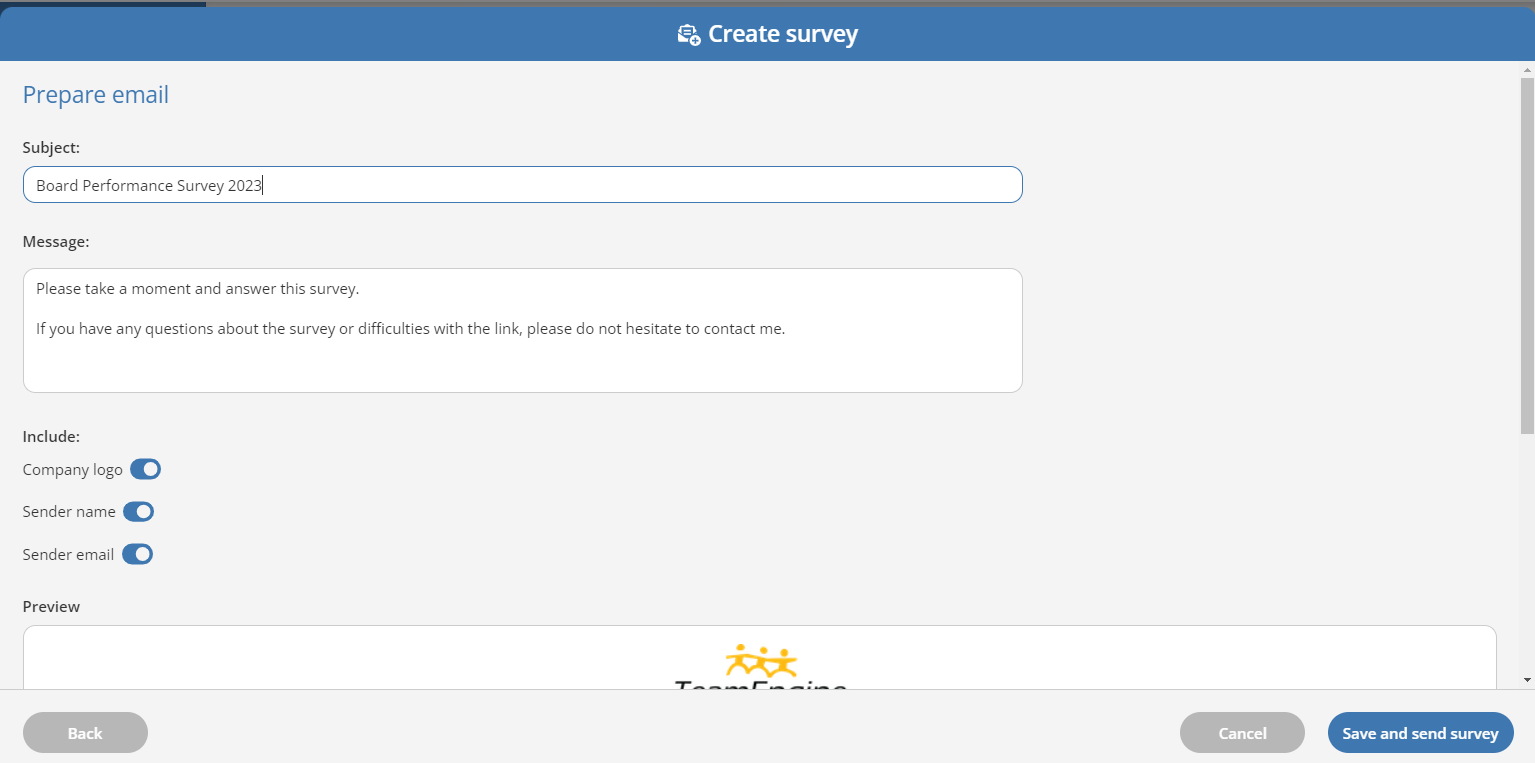
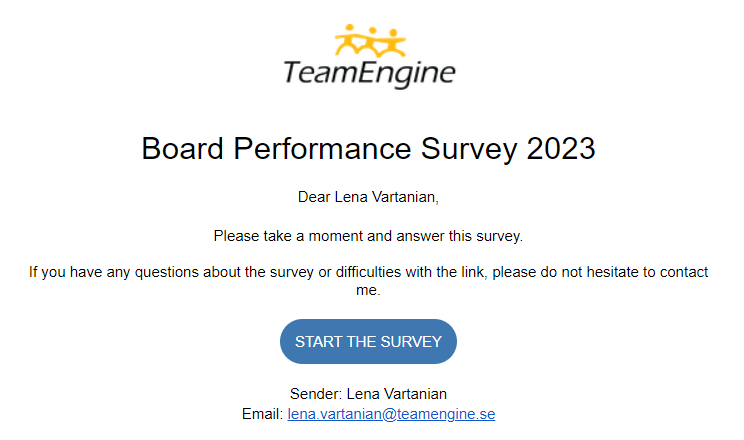
If you selected the option Unique respondents, the final step is to prepare and preview the email sent. Update message if you would like and scroll to the preview section at the bottom to see what it will look like to those who receive it. Respondent and sender's names will be added when sent. The Save button will either say Save and send or Save and schedule, depending on which of the two options you selected.
Respondents will recieve an email where they simply click Start the survey to open and answer all questions. If a survey is not immediately completed the system will remember where you left off and let you continue from the same place next time you click on the button.
Author: Lena Vartanian
Last update: 2023-01-27 14:31
Board Portal » Document management
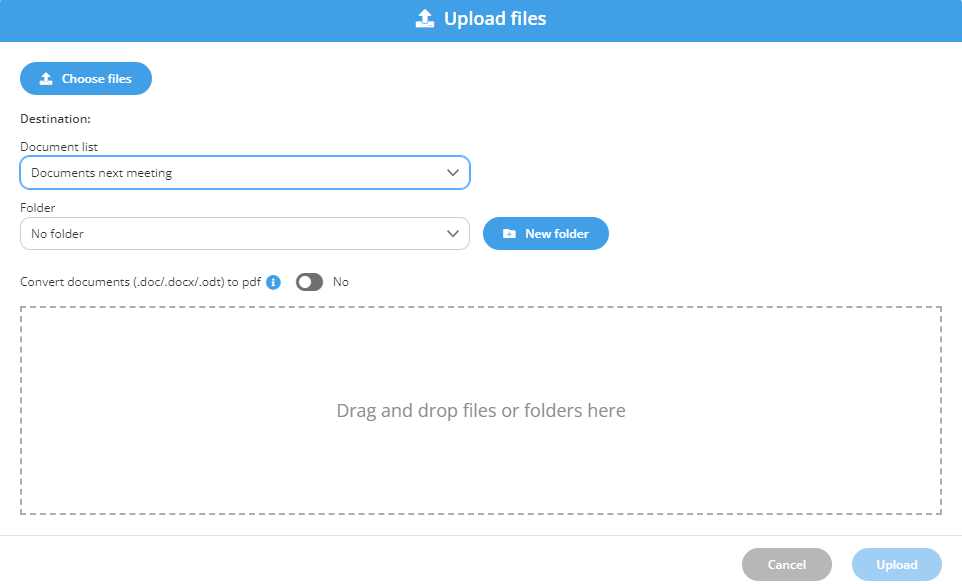
Upload document
TeamEngine supports all file formats. It is however recommended to upload pdf’s as the format enables functions such as annotations and e-signing. For best quality of pdf it is always best to convert on one’s computer before uploading.
1. Open the Document list in the left-hand menu into which you wish to upload documents
2. Click Upload Files
3. Select Choose Files to locate them on your computer and select the ones you wish to upload
4. Click Upload
5. Steps 2-4 can be skipped if you instead chose to drag and drop folder or documents directly to the Document List
Author: Lena Vartanian
Last update: 2023-02-23 10:46
Replace document
1. Click on the menu next to the document you would like to replace
2. Select Check out and edit
3. Scroll to the bottom of the page and select Replace file
4. Select file and Open
5. Save

Author: Lena Vartanian
Last update: 2023-02-15 10:14
Document properties
1. Click on the menu next to the document
2. Select Properties
3. Navigate through the tabs to take part of information such as Viewing and Send link history
Author: Lena Vartanian
Last update: 2023-02-15 10:13
Create e-signing
Follow these steps to create an e-signing process on a document in TeamEngine.
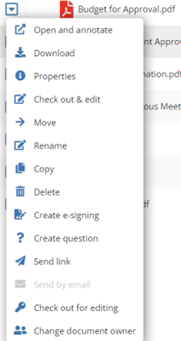
- Click on the quick menu
 to the left of the document.
E-signing can only be done on PDF-documents.
- Select Create e-signing.
- A window opens where Enable e-signing is already set to Yes.
- In the part called 2-step verification, you can choose how the members should verify themselves when they sign the document.
- In the drop-down list called Notify group when everyone has signed select if you want a group or those who are Portal administrators to receive an email when the signing process is finished.
- The checkbox to the left of Send notification to signers when e-signing process has started is checked by default. If you want the signing to take place in a certain order, you can uncheck this and then use the Send link function to send a message to those who should sign first.
- Then choose from the list of signers who will sign this document. All members who have access rights to the document are displayed here.
It is important to select everyone who will sign the document, once the process has started you cannot add or remove signers.
- In the text field Role, you can enter the role the various signers have for this particular document signing.
If something is already written in this field, the member has a title in their contact details. Changing role will not change the member's title.
- When you're done, click on Save and Close to start the signing process..
If you get stuck on step 2, open the Module settings and select the tab Advanced. Enable E-signing using the toggle and Save.
Author: Lena Vartanian
Last update: 2023-08-02 09:35
Board Portal » E-signing
Create e-signing
Follow these steps to create an e-signing process on a document in TeamEngine.
- Click on the quick menu to the left of the document.
E-signing can only be done on PDF-documents.
- Select Create e-signing.
- A window opens where Enable e-signing is already set to Yes.
- In the part called 2-step verification, you can choose how the members should verify themselves when they sign the document.
- In the drop-down list called Notify group when everyone has signed select if you want a group or those who are Portal administrators to receive an email when the signing process is finished.
- The checkbox to the left of Send notification to signers when e-signing process has started is checked by default. If you want the signing to take place in a certain order, you can uncheck this and then use the Send link function to send a message to those who should sign first.
- Then choose from the list of signers who will sign this document. All members who have access rights to the document are displayed here.
It is important to select everyone who will sign the document, once the process has started you cannot add or remove signers.
- In the text field Role, you can enter the role the various signers have for this particular document signing.
If something is already written in this field, the member has a title in their contact details. Changing role will not change the member's title.
- When you're done, click on Save and Close to start the signing process..
If you get stuck on step 2, open the Module settings and select the tab Advanced. Enable E-signing using the toggle and Save.
Author: Lena Vartanian
Last update: 2023-08-02 09:35
How to e-sign
- Open the paper that requires your signature
- Click Sign

- You will either have the option to sign immediately or select method of verification (one-time-password or Mobile BankID)
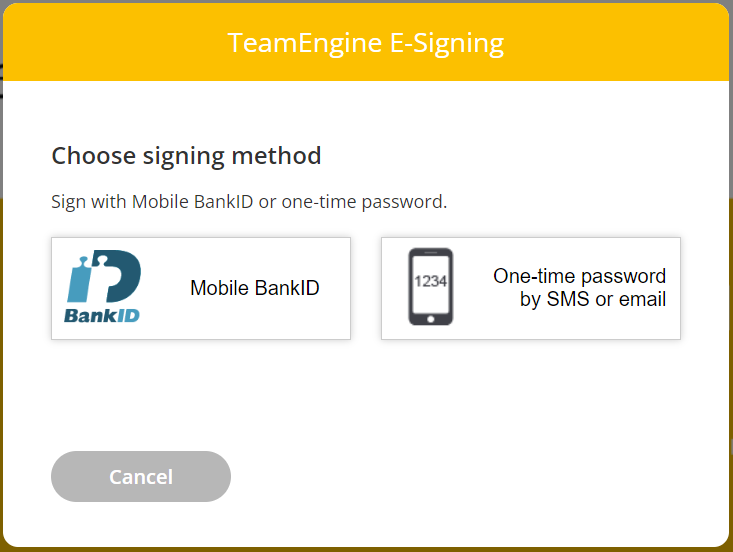
- Click either Sign or select method to proceed
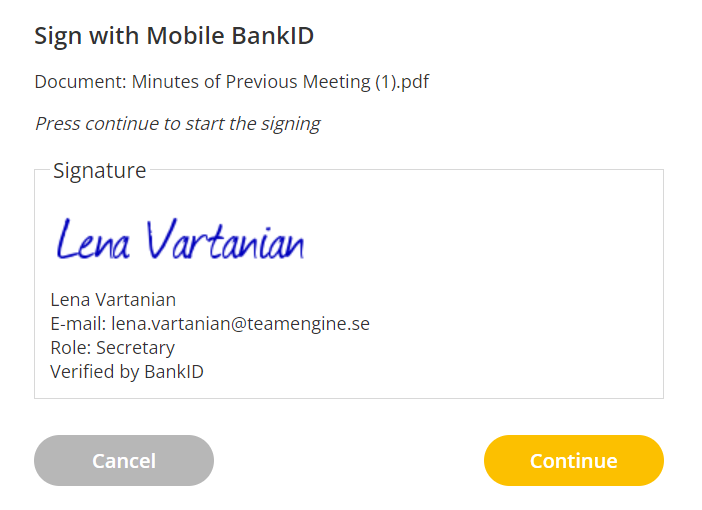
- Preview signature and click Continue to sign
- Wait until the page has loaded and scroll to last page to view your signature
- Close tab
Author: Lena Vartanian
Last update: 2023-02-15 10:18
Send reminder about e-signing
Follow these steps to send a reminder about a document that needs to be e-signed.
- Click the quick menu to the left of the document..
- Select Send link.
- A window opens where you can choose which individuals you want to send a reminder to.
- In the section called Send, you can choose how the message will be sent, such as email, SMS or both.
- Change the Subject of the message if necessary..
- In the section called Message you can enter your own text to be sent, it is important that the link itself remains so that they can easily reach the document to be signed..
Author: Kristian Johansson
Last update: 2023-08-02 09:10
See the status of the ongoing e-signing process
Follow these steps to view the status of an ongoing e-signing process on a document in TeamEngine.
- Click on the quick menu to the left of the document where an e-signing process is in progress..
- Select Properties.
- A window opens there where you then click on the E-signing tab to see the status of the ongoing e-signing process. Here you can see which individuals have been chosen to sign the current document, who has read it and the date and time when a person signed.
Author: Kristian Johansson
Last update: 2023-08-02 09:16
Cancel e-signing process
If for some reason you need to cancel a ongoing signing process, this can be done, but all signatures on the document will then be removed.
To cancel signing, follow these steps:
- Click the quick menu
 to the left of the document and select Check out & edit.
- Go to the E-Signing tab.
- Set Enable E-Signing to No.
- You will now receive a message that Existing signatures will be removed.
- Click OK.
- Then click Save and close to cancel the e-signing process.
- The e-signing process is now canceled and all signatures have been removed from the document.
Author: Kristian Johansson
Last update: 2023-08-02 09:46
Enable e-signing for Document list
In order to create an e-signing process on a PDF document, this function must be activated in the module settings for the current Document list.
- You will find Module settings under the arrow in the module menu.
- Once you've opened module settings, go to the Advanced tab.
- In the Advanced tab, you will find the Enable e-signing in this module. Set this to Yes.
- When you click on Save and close, e-signing will be activated and can now be created on PDF documents located in the document list.
Author: Kristian Johansson
Last update: 2023-08-02 09:50
Board Portal » Calendar
Create a meeting
1. Open the Calendar in the left-hand menu
2. Create event
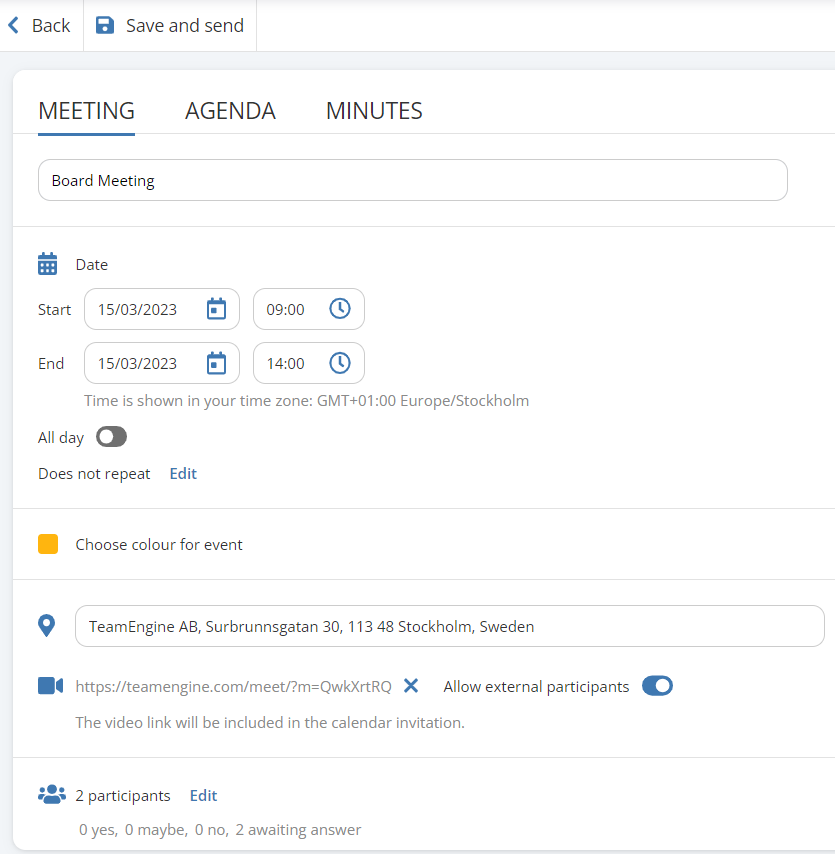
3. In first tab, Meeting, add all practical details
4. Add Participants if you want to send an invitation from the portal. The Save button will say Save and send if you have added participants so you will be informed whether anything is sent or not. Anything added to the Description field will be shown in the invitation.
Author: Lena Vartanian
Last update: 2023-04-17 14:56
Create agenda
- Open the meeting and click Edit (unless you just created it, in which case you simply can continue).
- Open tab Agenda
- Select either Create new agenda or Copy agenda from existing meeting.
- Add items and sub-items in the order you prefer. Drag and drop to reorder using the
 .
.
- Item type/Speaker/Time can be added to each item.
- Description can be used as you prefer.
- Click Add references or Upload files to add papers to specific items.
- If you selected to Add references then choose the module from which you would like to link items. Select papers and/or items and Add selected. Drag to reorder.
- If you selected to Upload files choose the Document list you want the documents to be uploaded to. Now choose the folder to upload to or use the New folder to create a new one. Finish by clicking on Upload.
- Save when you are done.
Nothing is sent automatically. To inform the board of the agenda and papers, Send link is found at the top. Click to select recipients and add any other information. Click Send to send.
Author: Lena Vartanian
Last update: 2023-10-31 15:49
Create board pack
1. Open meeting
2. Hover over Download / Print
3. Select Board Pack
4. Choose Destination (Select printer or Save as PDF)

Author: Lena Vartanian
Last update: 2023-04-17 14:56
About voting
With the voting function in the calendar, you can vote and make decisions in a simple and effective way. By using this function, you can quickly and easily make decisions without having to physically gather or engage in extensive correspondence. The function can be useful for various types of decisions, such as approving budgets, appointing new board members, deciding on projects or policies, and much more.
It is possible to create one or more votes on an agenda item in the calendar, and it is also possible to create a vote on a sub-item in the agenda. The option also exists to make the vote anonymous or not.
View the results of the vote
The results of a vote can be viewed for each individual vote, but there is also a voting overview where all votes that have taken place in a specific calendar can be seen. The voting overview can be accessed by going to More in the top menu and selecting Voting Overview.
Author: Kristian Johansson
Last update: 2023-04-17 14:56
Create voting
- Open the meeting where you want to create a vote and select Edit. If you just created the meeting, you can continue directly to the next step.
- Open the Agenda tab.
- If you haven't already created an agenda for the meeting, select Create new agenda or Copy agenda from existing meeting. Add items and sub-items in the order you want.
- Go to the item where you want to create a vote and select Add Voting.
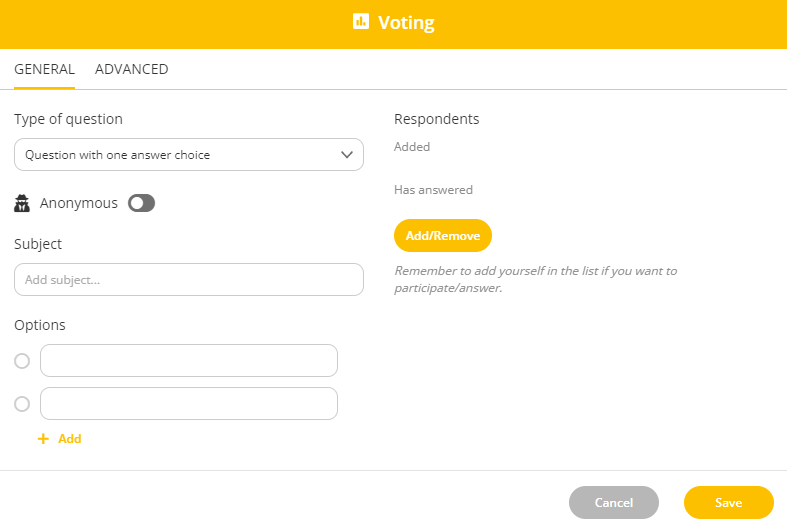
- Choose the type of question. If you only want to allow one of the answer options to be selected, choose Question with one answer option. If you want to allow multiple answer options to be selected, choose Question with multiple answer options. Both types of questions can include a free text box where respondents can leave a comment with their answer.
- Choose whether the vote should be anonymous or not.
- Enter a subject for the vote.
- Then enter the different answer options. If you need more options, you can click on + Add.
- To select who can participate in the vote, click on Add/Remove. In the window that opens up, you can choose who can respond among those who have access to the current calendar. When you have made your selection, click Save. If you do not choose who can respond, everyone who has access to the calendar will be able to respond to the current vote.
- Click Save to save the vote.
- Then click Save in the top menu to save the changes made in the meeting.
Author: Kristian Johansson
Last update: 2023-04-17 14:56
Edit voting
- Open the meeting where you want to edit a vote and select Edit.
- Open the Agenda tab.
- Go to the item where the vote you want to edit is located and click on

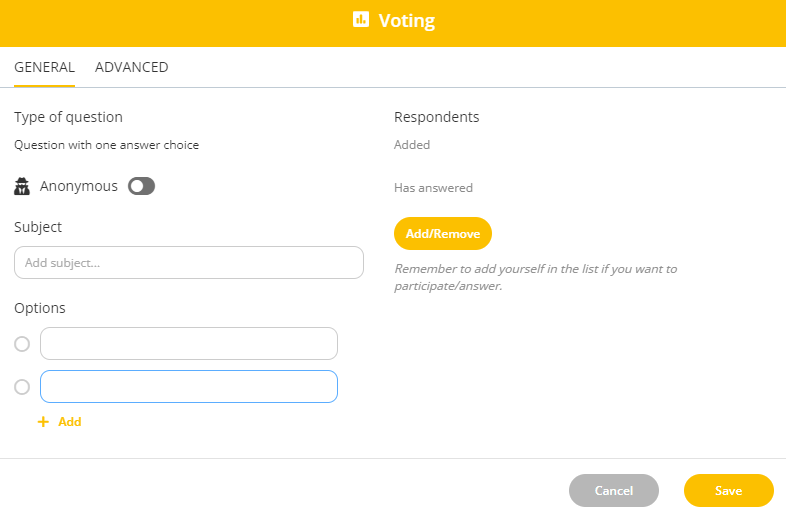
- Make your changes. Note that you cannot change the type of question afterwards, to do this, you must delete the vote and then create a new one.
- Press Save to save the vote.
- Then press Save in the top menu to save the changes made to the meeting.
Author: Kristian Johansson
Last update: 2023-04-17 14:56
Remove voting
- Open the meeting where you want to remove a vote and select Edit.
- Open the Agenda tab.
- Go to the item where the vote you want to remove is located and click on
 to the right of voting.
- Then press Save in the top menu to save the changes made to the meeting.
Author: Kristian Johansson
Last update: 2023-04-17 14:57
Vote / change your vote
Answer a vote:
- Open the meeting where the vote is located.
- Go to the Agenda and the item where the vote will take place and click on

- Make your choice and then select Save
Change your vote:
- Open the meeting where the vote is located.
- Go to the Agenda and the item where you want to change your vote and click on

- Then click on Edit answer. Note that this is only possible as long as the vote has not been closed.
- Change your answer and then select Save
Author: Kristian Johansson
Last update: 2023-04-17 14:57
Close / open voting
If you want to close a voting, so that no one can vote or change their answer anymore, you can follow these steps:
- Open the meeting where the voting is located.
- Go to the item where the voting you want to close is located and click on

- A dialogue box will open and ask if you really want to close the voting.
- Press Close voting to confirm.
If you would like to reopen a closed voting, click on 
Author: Kristian Johansson
Last update: 2023-04-17 14:57
Board Portal » Discussion forum
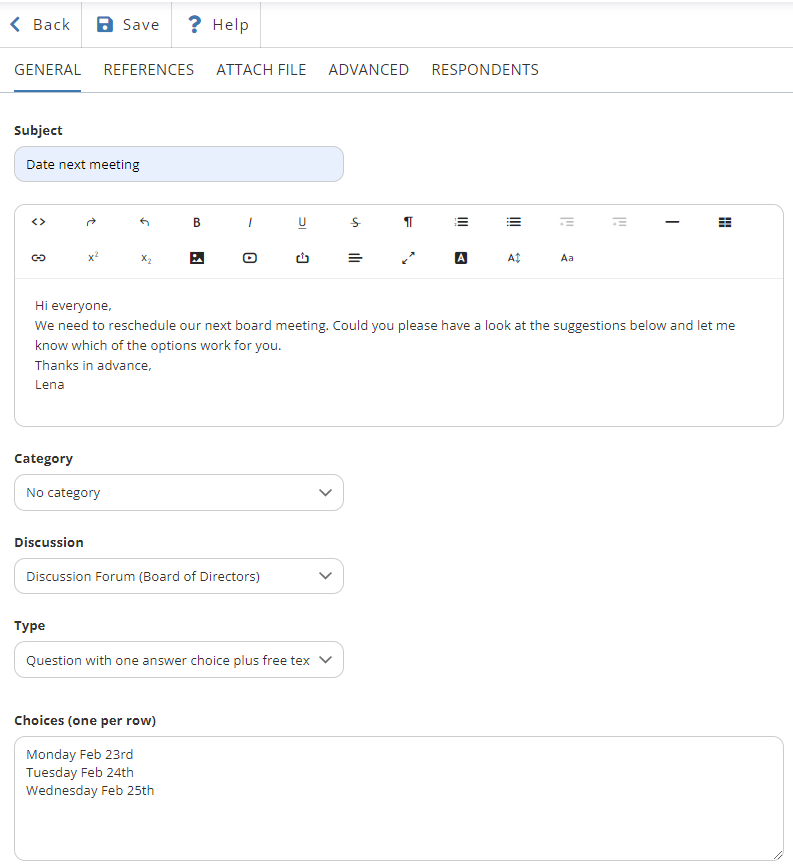
Multiple-choice question
Open Discussion forum. Hover over Create and select Multiple-choice question. Add subject and the question with any other information you wish to include. The text can be formated, videos embedded, images inserted and links added.
Open the drop-down Type to select what type of question you would like to ask. The option several answer choices and free text enables respondents to add additional information and give several options. The tab Advanced will let you set a deadline and enable automatic reminders. Open tab Respondents to select who you want to participate. Save. Send link.
Author: Lena Vartanian
Last update: 2023-01-27 15:00
Discussion entry
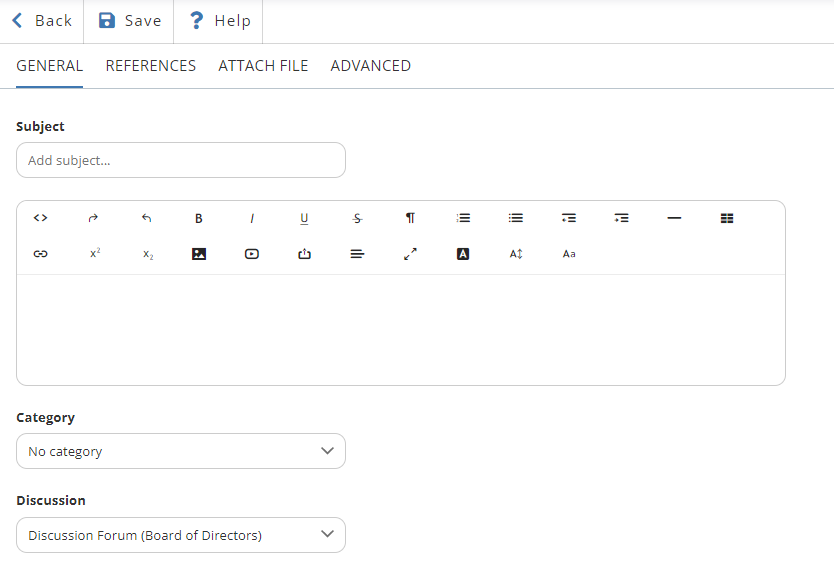
Open Discussion forum. Hover over Create and select Discussion entry.
Add subject and content. If you wish do add additional information you could either refer within the portal or attach individual files. Open tab Advanced if you wish to be notified of any activity in the thread.
A discussion entry can be used for anything from publishing and sharing internal newsletters to communication regarding certain subjects.
Author: Lena Vartanian
Last update: 2023-01-27 15:18
Insider Manager » Insider list
Create an Insider List
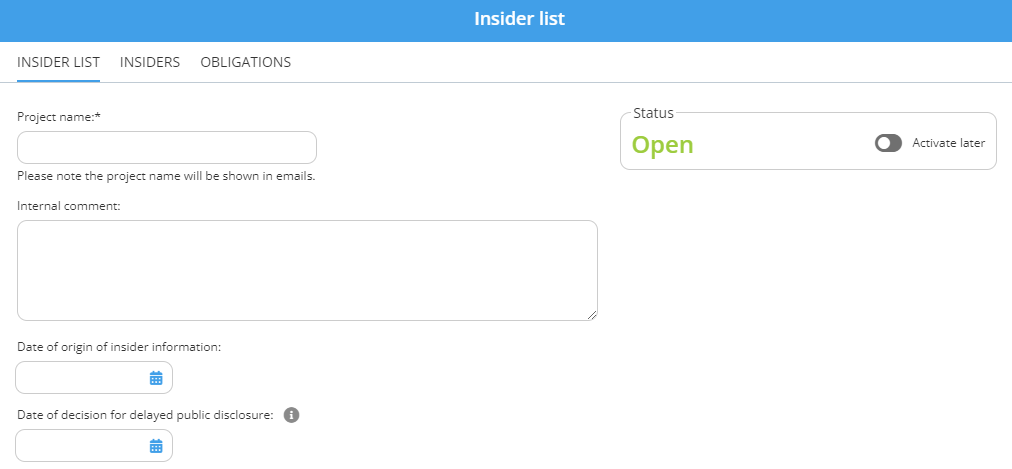
To create an insider list, start by opening the Insider List module in the left-hand menu.
- Hover over Create at the very top and select New insider list
- Add Project name (mandatory). The internal comment-field below can be added to add aditional information regarding the project.
- Under Status, you can select Activate later to set a date and time when the list should be activated. No emails will be sent to insiders until the insider list is activated.
- Add dates for when the information originated and when the decision was made to delay public disclosure. These can also be added at a later stage.
- If decision support is enabled, make sure to tick the box to ensure that all conditions have been met.
- Proceed to tab Insiders (found at the very top).
- Select Add insiders and add either per person or group. Save.
- Add Function and reason, Keep own insider list as well as time and date of when the insider/s obtained the information. Insiders can be added to an open list at any point.
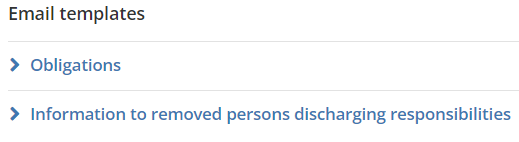
- Open tab Obligations for an overview and possibility to edit the obligations (fetched from your template).
- Save and send
Author: Lena Vartanian
Last update: 2023-12-22 10:10
Edit an insider list
You can open an insider list in edit mode in two ways:
- Click on the insider list project name. The insider list opens in a read only mode in a new window.
- Click on the menu option Edit.
- The insider list opens in edit mode.
Or:
- Click the quick menu
 to the left of the insider list's project name.
- Select Edit.
- The insider list opens in edit mode.
Author: Kristian Johansson
Last update: 2023-08-02 10:24
Close an Insider list
When the information has become public or the project is terminated for any reason, you can close the insider list. In TeamEngine Insider Manager there is a function for managing the Notification of delayed disclosure and sending it to the financial authority. If you do not want to use this feature, you can turn it off under the Advanced tab in the Module settings.
This is how you close an insider list when the feature Notification of delayed disclosure is turned on:
- Open the insider list in edit mode.
- Click on the menu option Close insider list.
- Select the reason for closing in drop-down-menu
- If you selected Public disclosure of insider information follow the instructions below or if you selected Other go to step 3 of the instruction in the next paragraph.
- You will now be taken to a form for Notification of delay in disclosure of insider information following the requirements specified in Article 17(4) of MAR. Some of the field will already be completed with information provided when the insider list was created. Fill in the other fields and enter the Date and Time of the public disclosure.
- Contact details of the person making the notification will automatically be filled in with the contact details you have registered in TeamEngine. Change these fields if you want to enter another person's contact information.
- Enter the email address to the financial authority. You can enter the default email address to use in Module setting, then you do not have to enter it every time.
- You can also choose to send a copy of the notification to the email address provided under Contact details of the person making the notification.
- Click Next.
- You will now come to a page where you can preview the emails that will be sent to all insiders and the financial authority. Click on Email to insider - send to see the preview of the email. You can also choose to edit the message by clicking the part you want to edit and then make your changes.
- Click Send and close insider list. The insider list changes status to closed and e-mails are sent to all insiders and to the financial authority.
This is how you close an insider list when the feature Notification of delayed disclosure is turned off:
- Open the insider list in edit mode.
- Click on the menu option Close insider list.
- Specify why the insider list is beeing closed. This is an internal comment that will not be shown to insiders.
- Enter the Date and Time of closing.
- Click Next.
- You will now come to a page where you can preview the emails that will be sent to all insiders. Click on Email to insider - send to see the preview of the email. You can also choose to edit the message by clicking the part you want to edit and then make your changes.
- Click Send and close insider list. The insider list changes status to closed and e-mails are sent to all insiders.
Author: Kristian Johansson
Last update: 2023-08-02 10:31
Insider Manager » Insiders
Create an insider
- Open the Insider Manager module.
- Hover over Create.
- Select Create Insider.
- Add e-mail address (the only mandatory contact detail at this stage as each insider will be asked to complete and confirm their details when added to a list).
- Add a mobile number if you would like the insider to receive their one-time password there the first time they confirm their details and obligations.
- Scroll to bottom of page if the insider is a PDMR and/or a permanent insider and toggle to enable.
- Save.
Author: Lena Vartanian
Last update: 2023-08-02 10:33
Edit an insider
You can open an insider in edit mode in two ways:
- Click on the insider's name. The Insider opens in a read only mode in a new window.
- Click on the menu option Edit.
- The insider opens in edit mode.
Or:
- Click the quick menu to the left of the insider's name
- Select Edit.
- The insider opens in edit mode.
Author: Kristian Johansson
Last update: 2023-08-02 10:37
Delete an insider
You can delete an insider from an Insider Manager. Only possible if the insider is no longer included in an open insider list and is not set as a Permanent insider.
Here's how to delete an Insider:
- Click on the quick menu to the left the name of the insider.
- Select Delete.
- A dialog box opens to verify that you really want to delete the current insider.
- Click the OK button.
- The insider is deleted from your Insider Manager.
Author: Kristian Johansson
Last update: 2023-08-02 10:40
Insider Manager » Module settings Insider Manager
Insider Manager Module Settings
Open the Insider Manager module in the left-hand menu and hover over the downward pointing arrow in the module menu. Select Module settings.
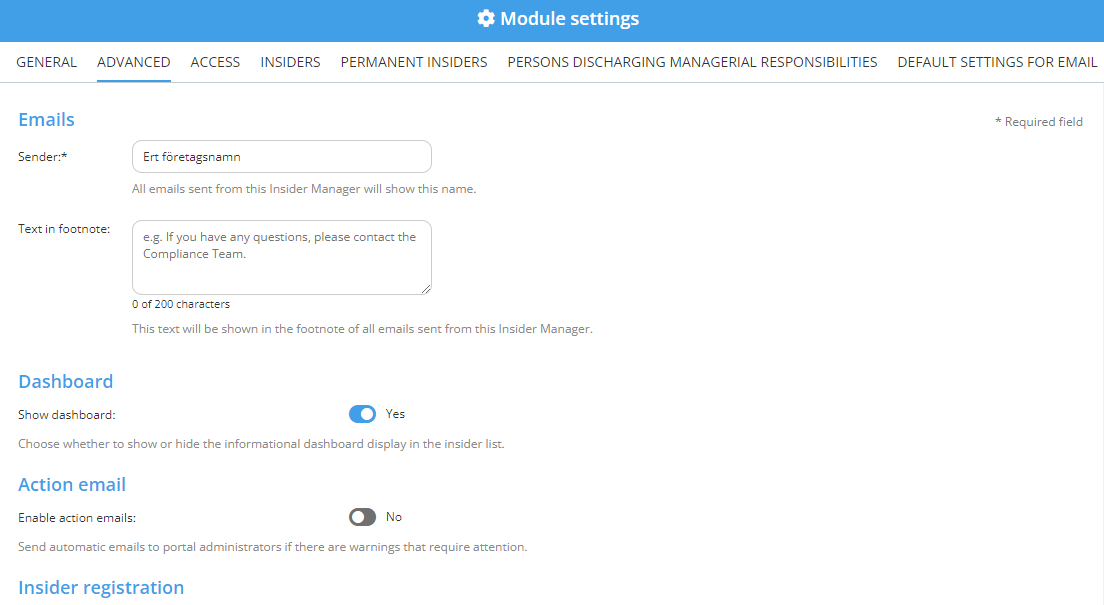
Advanced
It is important to go through all advanced settings when setting up your Insider Manager. Customise name of sender and add a footnote if you'd like to include information such as your contact details in the emails sent from the system.
It is recommended to enable the Dashboard as it provides an excellent overview immediately upon login.
Enable Action emails if you would like to receive emails when there are warnings in the system that require your attention.
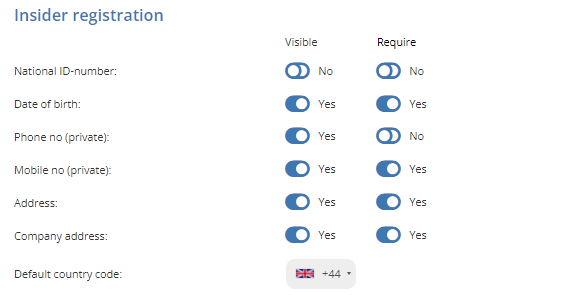
Insider registration. Toggle to decide whether you would like specific contact details to be Visible and/or Required.
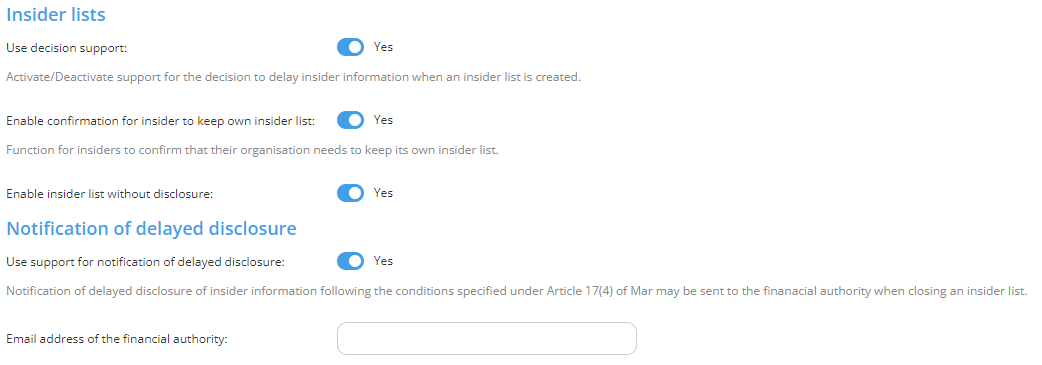
The Use decision support toggle enables you to decide whether you want criteria visible when creating an insider list.
The Enable confirmation for insider to keep own insider list allows you to ask an insider to maintain their own insider list of those who have access to the information within their organization.
The Enable insider list without disclosure allows you to choose to create a list where not all fields need to be filled in.
Notification of delayed disclosure is compatible with the Swedish Financial Authorities' method of notifaction. Enable and add their email address.
Access
Access rights of the module seldom need to be changed in the Insider Manager as only a restricted few should have access to it in the first place.
Insiders
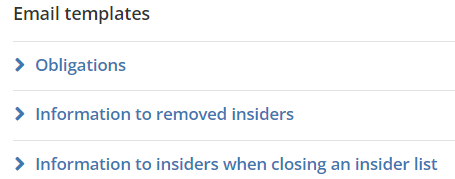
Add email templates for each of the emails that will be sent to insiders. The obligations template can always be edited when creating an insider list.
Permanent insiders
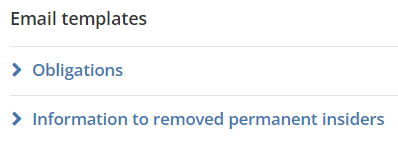
Add email templates for each of the emails that will be sent to permanent insiders.
Persons Discharging Managerial Responsibilities
Add email templates for each of the emails that will be sent to persons discharging managerial responsibilities.
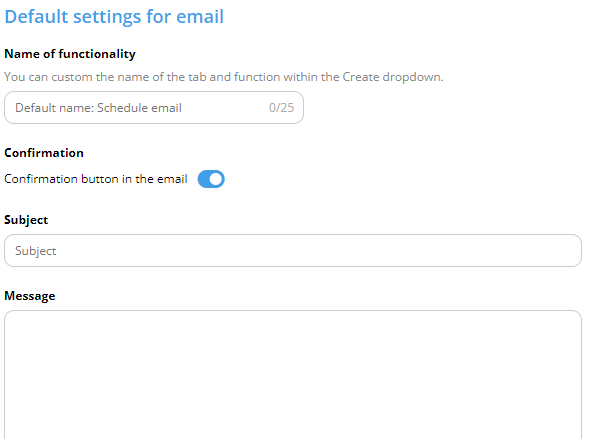
Default settings for email
Name of functionality allows you to customize the name of this function.This will change the name of the tab itself but also under the Create menu.
Confirmation allows you to choose whether it should be possible to have a confirmation button in the emails that are sent out.
Subject enables you to set the default for what should be in the subject line when a new email is created.
Message allows you to set defaults for what should be under the message when a new email is created.
Author: Lena Vartanian
Last update: 2023-12-21 16:02
Survey Manager » Recipients
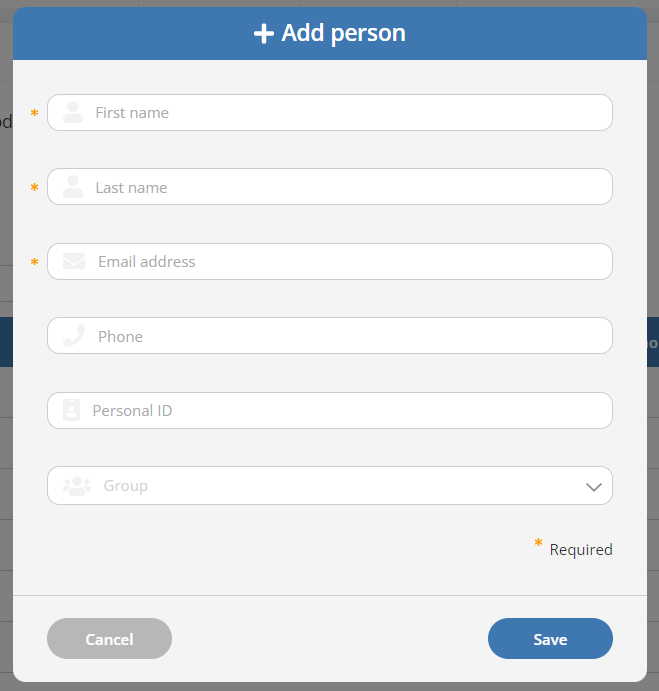
Recipients
To conduct a survey with unique respondents, they need to be added to the Recipients list found in the left-hand menu.
Edit groups can be selected to create and edit groups. Doing this can make the process of sending surveys more streamlined as you will be able to easily send to an entire group as opposed to selecting one by one.
Select Add person. Fill in all mandatory fields and select group if you would like to add the person to one. Save. To import many at once you will find the option to Import from CSV file. There is a template to download if you are unsure of the exact format.
Author: Lena Vartanian
Last update: 2023-01-16 10:22
General » Member Administration
Invite/Register Users
1. Open Members
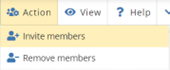
2. Select Action
3. Invite members
4. Select either Invite members or Registration only
5. Enter e-mail address(es), one per row
6. Click Send invitation/Register members in the upper left-hand corner
If you have registered members, hover over Action and select Invite registered members. Select those you would like to invite and select Send invitation.
Author: Lena Vartanian
Last update: 2023-04-11 16:44
Assign Portal Administrator
1. Open Members
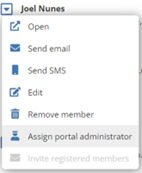
2. Scroll to the person you would like to assign Portal Administrator
3. Select the menu next to their name and select Assign portal administrator'
Author: Lena Vartanian
Last update: 2022-11-17 10:11
Create access group
With the help of access groups, the Portal administrator can control which members should have access to the portal's modules and what they should be able to do in each module. As a Portal administrator, you can create several access groups in a portal, and you create these from the member list.
- Go to Members in the top right menu.
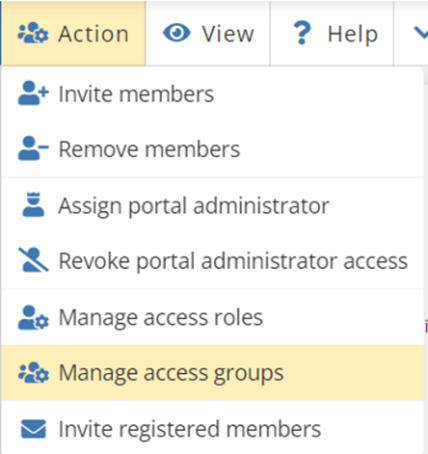
- Go to Action in the menu on the member page.
- Select Manage access Groups.
- A new window will open up.
- Click Create new group.
- Enter the name for the new access group.
- Click OK to create the new group.
Author: Lena Vartanian
Last update: 2023-11-03 11:04
Remove members
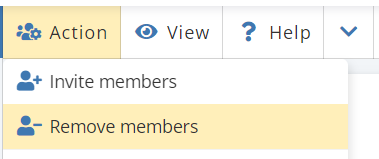
- Open Members
- Hover over Actions
- Select Remove members
- Select the members you would like to delete
- It is optional to add a message and send an email to the members removed. If you deselect 'Send email' they will not be notified at all
- Save and close
Removed members immediately lose access to your portal.
Author: Lena Vartanian
Last update: 2023-01-05 12:00
Change email address
In TeamEngine, your username is the same as your email address. You have the option to change your email address from My Settings. Only the member themselves can change their e-mail address, as a Portal administrator you cannot do this.
-
Go to your name in the top right menu and select My Settings.
-
Click the Change email address button.
-
A new window will open to change email address.
-
Enter your new email address and confirm by entering it again. Note: the new email address must not already be a used in another TeamEngine portal.
-
Enter your password.
-
Click on Save. The window closes and you are return to My Settings.
-
Click on Save and Close in My Settings.
-
Your new e-mail address is now saved, but please note that it will not take effect until the next day.
Author: Kristian Johansson
Last update: 2023-11-03 10:32
Edit access group
With the help of access groups, the Portal administrator can control which members should have access to the portal's modules and what they should be able to do in each module. As a Portal administrator, you can create several access groups in a portal, and you create these from the member list.
- Go to Members in the top right menu.
- Go to Action in the menu on the member page.
- Select Manage access Groups.
- A new window will open up.
- In the drop-down menu, select the group you want to edit.
- You can now choose which people should be included in the current group by ticking the box to the left of their name. In order for these changes to take effect, you must press Save in the upper part before you can select another group to edit.
- If you want to change the name of the group, click on Rename group and if you want to delete the group completely, select Delete group.
- Once you've made your changes, click Save.
Author: Kristian Johansson
Last update: 2023-11-03 11:11
General » Administration
Invite/Register Users
1. Open Members
2. Select Action
3. Invite members
4. Select either Invite members or Registration only
5. Enter e-mail address(es), one per row
6. Click Send invitation/Register members in the upper left-hand corner
If you have registered members, hover over Action and select Invite registered members. Select those you would like to invite and select Send invitation.
Author: Lena Vartanian
Last update: 2023-04-11 16:44
Assign Portal Administrator
1. Open Members
2. Scroll to the person you would like to assign Portal Administrator
3. Select the menu next to their name and select Assign portal administrator'
Author: Lena Vartanian
Last update: 2022-11-17 10:11
Create access group
With the help of access groups, the Portal administrator can control which members should have access to the portal's modules and what they should be able to do in each module. As a Portal administrator, you can create several access groups in a portal, and you create these from the member list.
- Go to Members in the top right menu.
- Go to Action in the menu on the member page.
- Select Manage access Groups.
- A new window will open up.
- Click Create new group.
- Enter the name for the new access group.
- Click OK to create the new group.
Author: Lena Vartanian
Last update: 2023-11-03 11:04
Edit or delete existing modules
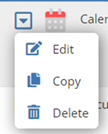
1. Scroll to the module in which you want to make changes
2. Either click the menu to the left of the module’s name, or on the module’s name
3. If you’d like to delete the entire module, click Delete
Author: Lena Vartanian
Last update: 2022-11-17 10:42
Portal appearance and layout
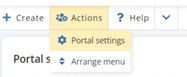
1. Hover over Actions
2. Select Portal settings
3. Navigate through the tabs to set up colours, add logo etc
Author: Lena Vartanian
Last update: 2022-11-17 10:52
Edit access group
With the help of access groups, the Portal administrator can control which members should have access to the portal's modules and what they should be able to do in each module. As a Portal administrator, you can create several access groups in a portal, and you create these from the member list.
- Go to Members in the top right menu.
- Go to Action in the menu on the member page.
- Select Manage access Groups.
- A new window will open up.
- In the drop-down menu, select the group you want to edit.
- You can now choose which people should be included in the current group by ticking the box to the left of their name. In order for these changes to take effect, you must press Save in the upper part before you can select another group to edit.
- If you want to change the name of the group, click on Rename group and if you want to delete the group completely, select Delete group.
- Once you've made your changes, click Save.
Author: Kristian Johansson
Last update: 2023-11-03 11:11
General » My Settings
My settings
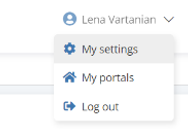
My settings is always found when you have logged in to a portal, below your name at the very top.
Contact information. The first tab allows you to review and edit all of your contact details. This tab is also where you may update your log in details.
Authentication methods. To enable other authentication methods for single sign-on in TeamEngine open this tab and click Activate next to selected method. It is important that the e-mail address with which you are registered in TeamEngine is exactly the same as the account you want to connect.
Settings. This is where you can select whether you want regular activity reports from your portal, as well as select whether or not you would like to recieve our newsletters.
My portals. If you are member of more than one portal, open this tab to organise them as you please.
Signature. If you are an admin and/or regularly send information from your portal this is where you may customise your e-mail signature.
My devices. An overview of all devices on which you have downloaded and used the TeamEngine app. You can also Block the app on each device to remote wipe all content within it.
Legal. Privacy policy and User terms.

Author: Lena Vartanian
Last update: 2023-01-05 11:34
How do I activate other authentication methods?
To log in with Google, Microsoft and Mobile BankID these functions must be activated for your TeamEngine account.
- Log in to TeamEngine in your browser with your username and password. It is not possible to activate these authentication methods using the TeamEngine app.
- Go to My settings which can be found under your name in the system menu in the top right corner.
- Under the tab Authentication methods, you can choose which methods to activate.
Author: Kristian Johansson
Last update: 2024-03-04 08:59
General » Password
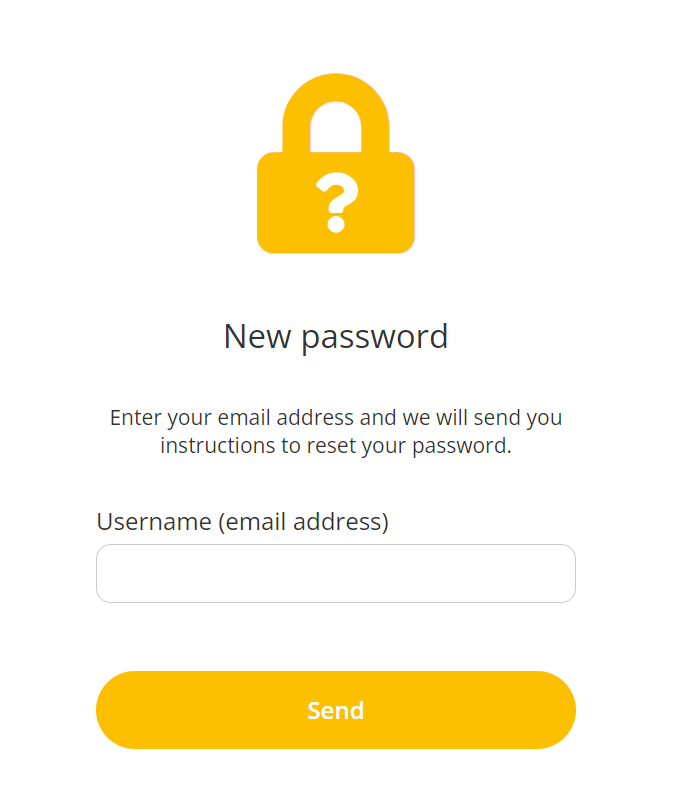
Reset password
Please follow the link below to reset your password. It is important that you submit the exact e-mail address with which you are registered in TeamEngine.
RESET PASSWORD
Author: Lena Vartanian
Last update: 2023-01-27 15:32
Change your password
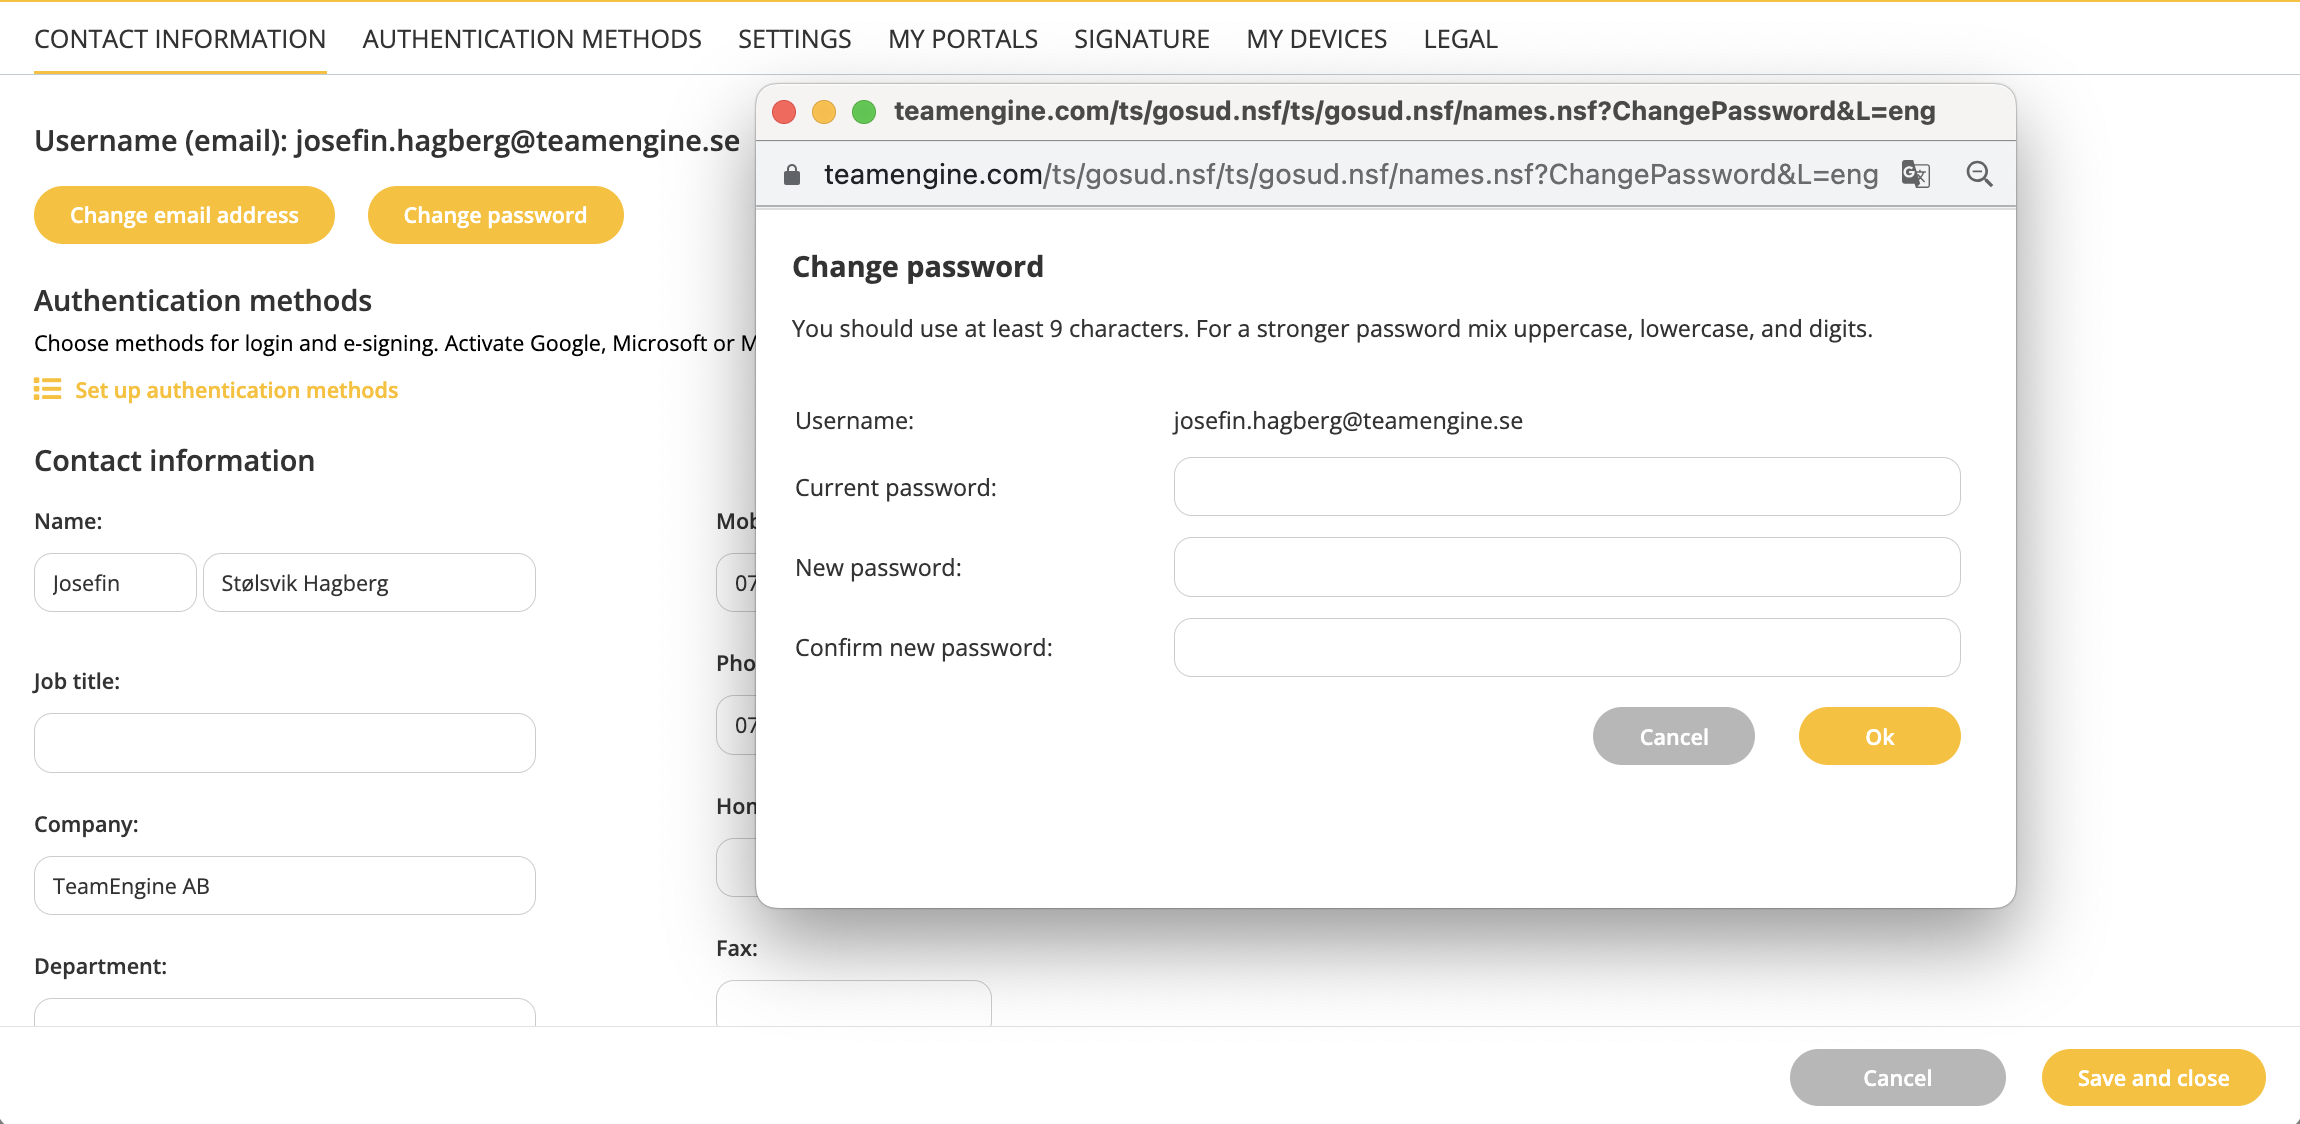
Follow these steps to change your password in My Settings:
- Go to your name in the top right menu and select My settings.
- Click the Change password button.
- A new window will open.
- Enter your old password and your new password, and confirm the new password by entering it again. To ensure that the password is sufficiently secure, it must:
- Contain at least 10 characters.
- Contain the same character a maximum of two times.
- Contain both lower-case and upper-case letters.
- When you are done, click OK.
- The form will close and you will be returned to my settings.
- Click on Save and close in my settings.
- Your new password is now saved. However, please note that it might take up to 15 minutes before the new password starts to work.
Author: Kristian Johansson
Last update: 2023-11-06 13:34
Board Portal » Activity list
Create new activity
You can create a new activity regardless of whether you yourself will be responsible or if you want to delegate the responsibility to another member.
To create a new activity, follow these steps::
- Click on Create in the module menu.
- Select Activity.
- An activity form in editable mode opens in a separate window.
- Fill in the description, start date and deadline in the activity form. Here you also choose who will be responsible for the activity and whether they should receive a reminder.
- Click Save and Close.
- The activity form closes and the activity is saved in the Activity list.
Author: Kristian Johansson
Last update: 2023-08-02 10:14
Create multiple activities
You can create up to six activities at once, in a simplified form:
- Click on Create in the module menu.
- Select Multiple Activities.
- An activity form for multiple activities opens in a separate window.
- Fill in the description, deadline and person responsible for each activity. Note! You cannot specify a start date when creating multiple activities at the same time.
- Click on Save and Close.
- The activities are saved in the Activity list and the activity form is cleared so that you can create more activities from the form.
Author: Kristian Johansson
Last update: 2023-08-02 10:16
Board Portal » Meeting Zone
About Meeting Zone
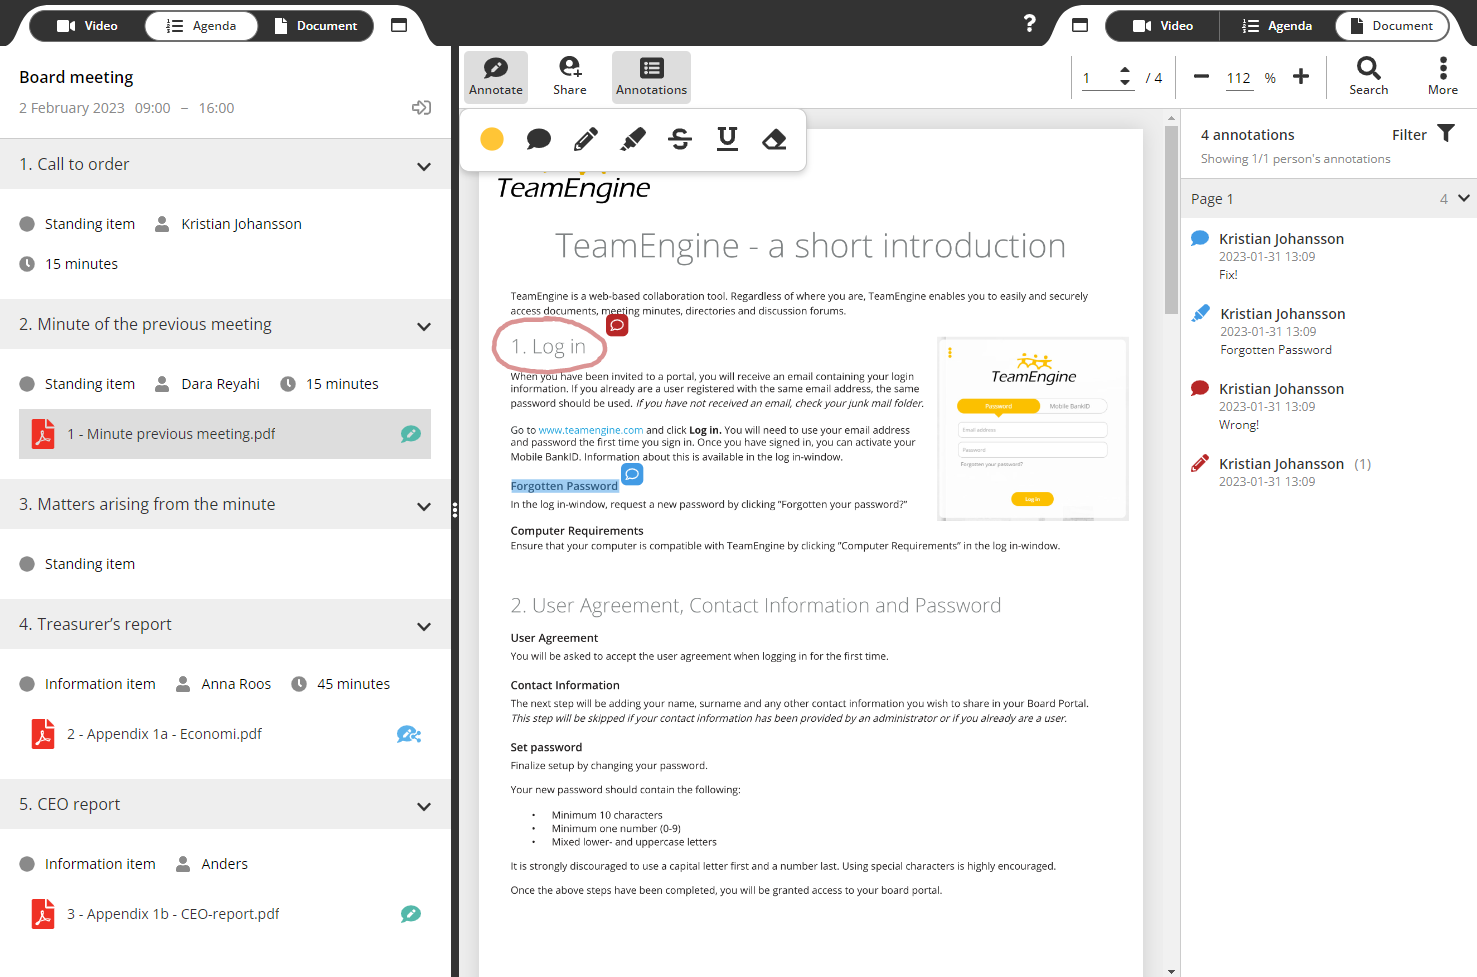
The Meeting Zone is used to view documents, connect to video conference and it is also where you can make your own and see other people's annotations on documents. To use video conferencing, the TeamEngine Meet add-on service is required..
Icons in the top menu
At the top of the Meeting Zone there are a number buttons to choose between: Video, Agenda and Document. You can use these to choose which view you want in the two panels found in the meeting manager. Video is only visible if you have add-on service TeamEngine Meet activated in your portal and it is activated for the current meeting.

These icons appear in the top menu of the Meeting Zone.
Icons in the left menu
These icons appear in the left menu of the Meeting Zone.
Author: Kristian Johansson
Last update: 2023-04-17 14:58
Create annotations
To create annotations, click the Annotating Tools icon in the top menu. The menu will open and you may choose which of the tools you wish to use. You can select colors for all annotation types.

Author: Kristian Johansson
Last update: 2023-04-17 14:59
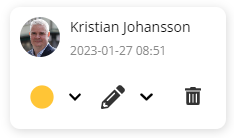
Edit annotations
Click on the annotation you want to edit and a small popup will open for that particular annotation and you can make the changes you want. When you're satisfied, click outside the popup and your changes will be saved.
Author: Kristian Johansson
Last update: 2023-04-17 14:59
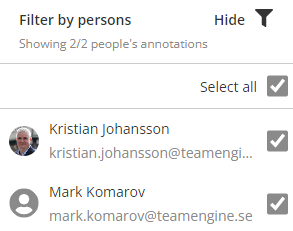
Show/hide annotations
To choose which annotations to display, click the Annotations icon in the top menu. Then click on Filter in the right panel and check or uncheck the checkbox next to the names you want to show/hide to change which notes are visible.
Author: Kristian Johansson
Last update: 2023-04-17 14:59
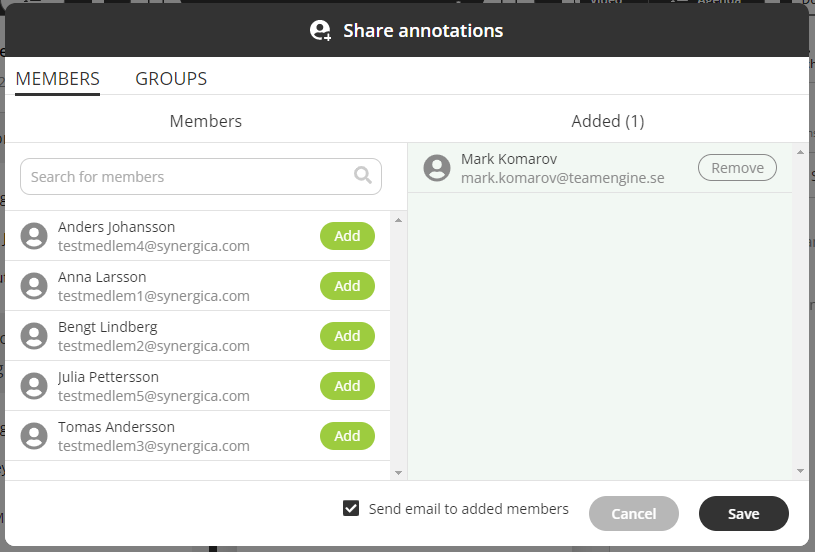
Share annotations
If you want to share annotations, click the Share annotations icon in the upper menu . Add the people you want to share your annotations with and click Save. They will receive an e-mail with a link leading them directly to the document.
Author: Kristian Johansson
Last update: 2023-04-17 14:59
Copy annotations
To copy annotations to the latest version of a document, follow these steps:
- Click More in the top menu.
- Then click on Version history.
- Then select Copy latest annotations.
- A dialog box will open asking if you want to copy annotations, select Copy.
Keep in mind that the position of the annotations will not be adapted to changes in the document. Due to this, the annotations may not be in the correct position.
- A preview of the copied notes will appear. If you want to copy over the annotations, select Keep annotations, otherwise select Reset..
- Annotations from the previous version of the document have now been copied over to the current version.
Author: Kristian Johansson
Last update: 2023-08-11 09:02
App » Meeting Zone in app
About Meeting Zone
The Meeting Zone is used to view documents, connect to video conference and it is also where you can make your own and see other people's annotations on documents. To use video conferencing, the TeamEngine Meet add-on service is required..
Icons in the top menu
At the top of the Meeting Zone there are a number buttons to choose between: Video, Agenda and Document. You can use these to choose which view you want in the two panels found in the meeting manager. Video is only visible if you have add-on service TeamEngine Meet activated in your portal and it is activated for the current meeting.
These icons appear in the top menu of the Meeting Zone.
Icons in the left menu
These icons appear in the left menu of the Meeting Zone.
Author: Kristian Johansson
Last update: 2023-04-17 14:58
Create annotations
To create annotations, click the Annotating Tools icon in the top menu. The menu will open and you may choose which of the tools you wish to use. You can select colors for all annotation types.
Author: Kristian Johansson
Last update: 2023-04-17 14:59
Edit annotations
Click on the annotation you want to edit and a small popup will open for that particular annotation and you can make the changes you want. When you're satisfied, click outside the popup and your changes will be saved.
Author: Kristian Johansson
Last update: 2023-04-17 14:59
Show/hide annotations
To choose which annotations to display, click the Annotations icon in the top menu. Then click on Filter in the right panel and check or uncheck the checkbox next to the names you want to show/hide to change which notes are visible.
Author: Kristian Johansson
Last update: 2023-04-17 14:59
Share annotations
If you want to share annotations, click the Share annotations icon in the upper menu . Add the people you want to share your annotations with and click Save. They will receive an e-mail with a link leading them directly to the document.
Author: Kristian Johansson
Last update: 2023-04-17 14:59
App » Calendar in app
Create a meeting
1. Open the Calendar in the left-hand menu
2. Create event
3. In first tab, Meeting, add all practical details
4. Add Participants if you want to send an invitation from the portal. The Save button will say Save and send if you have added participants so you will be informed whether anything is sent or not. Anything added to the Description field will be shown in the invitation.
Author: Lena Vartanian
Last update: 2023-04-17 14:56
Create agenda
- Open the meeting and click Edit (unless you just created it, in which case you simply can continue).
- Open tab Agenda
- Select either Create new agenda or Copy agenda from existing meeting.
- Add items and sub-items in the order you prefer. Drag and drop to reorder using the .
- Item type/Speaker/Time can be added to each item.
- Description can be used as you prefer.
- Click Add references or Upload files to add papers to specific items.
- If you selected to Add references then choose the module from which you would like to link items. Select papers and/or items and Add selected. Drag to reorder.
- If you selected to Upload files choose the Document list you want the documents to be uploaded to. Now choose the folder to upload to or use the New folder to create a new one. Finish by clicking on Upload.
- Save when you are done.
Nothing is sent automatically. To inform the board of the agenda and papers, Send link is found at the top. Click to select recipients and add any other information. Click Send to send.
Author: Lena Vartanian
Last update: 2023-10-31 15:49
Create board pack
1. Open meeting
2. Hover over Download / Print
3. Select Board Pack
4. Choose Destination (Select printer or Save as PDF)
Author: Lena Vartanian
Last update: 2023-04-17 14:56
About voting
With the voting function in the calendar, you can vote and make decisions in a simple and effective way. By using this function, you can quickly and easily make decisions without having to physically gather or engage in extensive correspondence. The function can be useful for various types of decisions, such as approving budgets, appointing new board members, deciding on projects or policies, and much more.
It is possible to create one or more votes on an agenda item in the calendar, and it is also possible to create a vote on a sub-item in the agenda. The option also exists to make the vote anonymous or not.
View the results of the vote
The results of a vote can be viewed for each individual vote, but there is also a voting overview where all votes that have taken place in a specific calendar can be seen. The voting overview can be accessed by going to More in the top menu and selecting Voting Overview.
Author: Kristian Johansson
Last update: 2023-04-17 14:56
Create voting
- Open the meeting where you want to create a vote and select Edit. If you just created the meeting, you can continue directly to the next step.
- Open the Agenda tab.
- If you haven't already created an agenda for the meeting, select Create new agenda or Copy agenda from existing meeting. Add items and sub-items in the order you want.
- Go to the item where you want to create a vote and select Add Voting.
- Choose the type of question. If you only want to allow one of the answer options to be selected, choose Question with one answer option. If you want to allow multiple answer options to be selected, choose Question with multiple answer options. Both types of questions can include a free text box where respondents can leave a comment with their answer.
- Choose whether the vote should be anonymous or not.
- Enter a subject for the vote.
- Then enter the different answer options. If you need more options, you can click on + Add.
- To select who can participate in the vote, click on Add/Remove. In the window that opens up, you can choose who can respond among those who have access to the current calendar. When you have made your selection, click Save. If you do not choose who can respond, everyone who has access to the calendar will be able to respond to the current vote.
- Click Save to save the vote.
- Then click Save in the top menu to save the changes made in the meeting.
Author: Kristian Johansson
Last update: 2023-04-17 14:56
Edit voting
- Open the meeting where you want to edit a vote and select Edit.
- Open the Agenda tab.
- Go to the item where the vote you want to edit is located and click on
- Make your changes. Note that you cannot change the type of question afterwards, to do this, you must delete the vote and then create a new one.
- Press Save to save the vote.
- Then press Save in the top menu to save the changes made to the meeting.
Author: Kristian Johansson
Last update: 2023-04-17 14:56
Remove voting
- Open the meeting where you want to remove a vote and select Edit.
- Open the Agenda tab.
- Go to the item where the vote you want to remove is located and click onto the right of voting.
- Then press Save in the top menu to save the changes made to the meeting.
Author: Kristian Johansson
Last update: 2023-04-17 14:57
Vote / change your vote
Answer a vote:
- Open the meeting where the vote is located.
- Go to the Agenda and the item where the vote will take place and click on
- Make your choice and then select Save
Change your vote:
- Open the meeting where the vote is located.
- Go to the Agenda and the item where you want to change your vote and click on
- Then click on Edit answer. Note that this is only possible as long as the vote has not been closed.
- Change your answer and then select Save
Author: Kristian Johansson
Last update: 2023-04-17 14:57
Close / open voting
If you want to close a voting, so that no one can vote or change their answer anymore, you can follow these steps:
- Open the meeting where the voting is located.
- Go to the item where the voting you want to close is located and click on
- A dialogue box will open and ask if you really want to close the voting.
- Press Close voting to confirm.
If you would like to reopen a closed voting, click on
Author: Kristian Johansson
Last update: 2023-04-17 14:57
App » About the app
Download App
iOS (Apple)
To download the app to your iPhone or iPad, go to the App store on your device and search for TeamEngine. You can also click the icon below to download the app.

Android
To download the app to your Android phone or tablet, go to Google Play on your device and search for TeamEngine. You can also click the icon below to download the app.

Author: Kristian Johansson
Last update: 2023-10-17 13:12
General » Manual
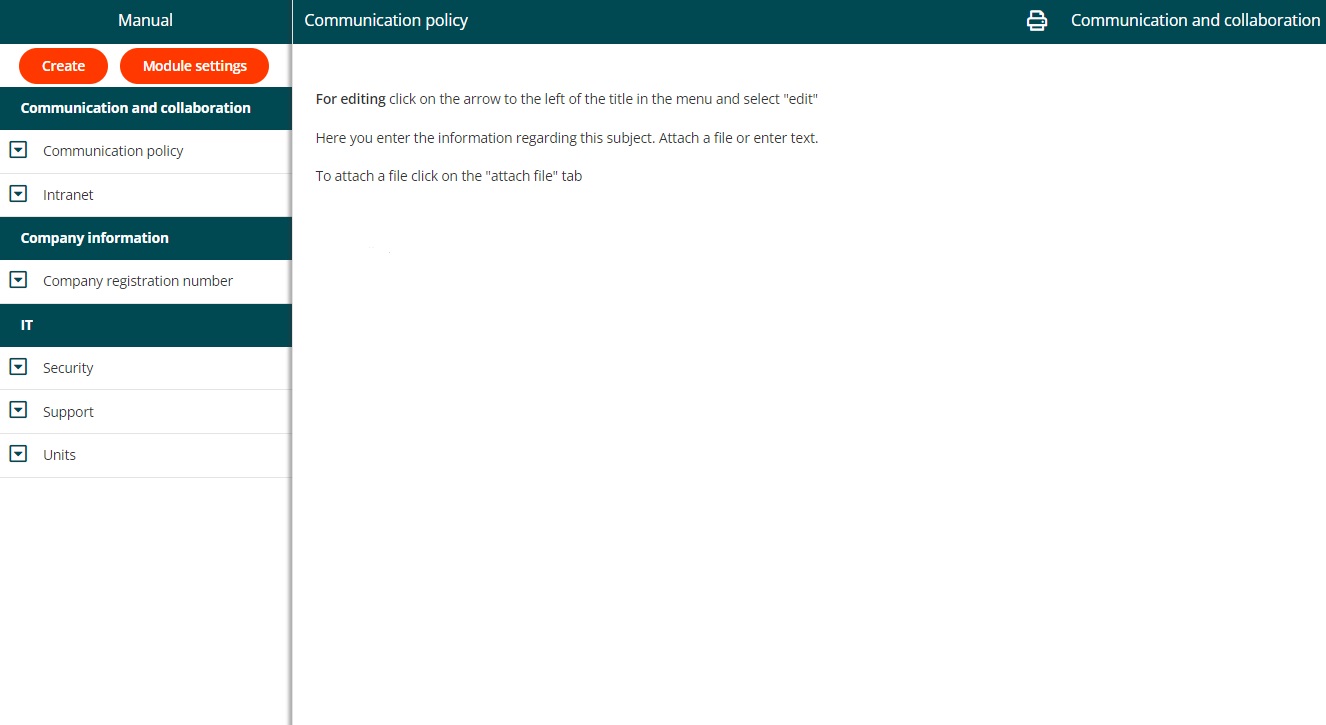
About Manual
With the Manual module in TeamEngine, members can read instructions, guidelines and policies on information pages collected in a structured manual. The manual opens in a separate browser window and has its own table of contents on the left, from where you navigate through the manual's content.
The content of the manual consists of sections structured under different chapters. In the manual, there is a table of contents on the left, from which you can click between pages and contents of the manual. The contents appear in the frame to the right of the table of contents in the manual.
The content can only be created and edited by members who have been authorized to create in the current module or by the Portal administrator. Other members can only open the manual sections in read mode.

Author: Mark Komarov
Last update: 2024-01-04 14:04
Delete a manual section
1. Click the context menu to the left of the manuals section in the table of contents.
2. Select Delete.
3. A dialog box opens with a verification question if you really want to delete the current manual section.
4. Click the OK button.
5. The manual section is deleted from the manual.

Author: Mark Komarov
Last update: 2024-01-04 14:05
Edit a manual section
1. Click the context menu to the left of the manuals section in the table of contents.
2. Select Edit.
3. The manual section opens in edit mode in the right-hand frame.
Author: Mark Komarov
Last update: 2024-01-04 14:09
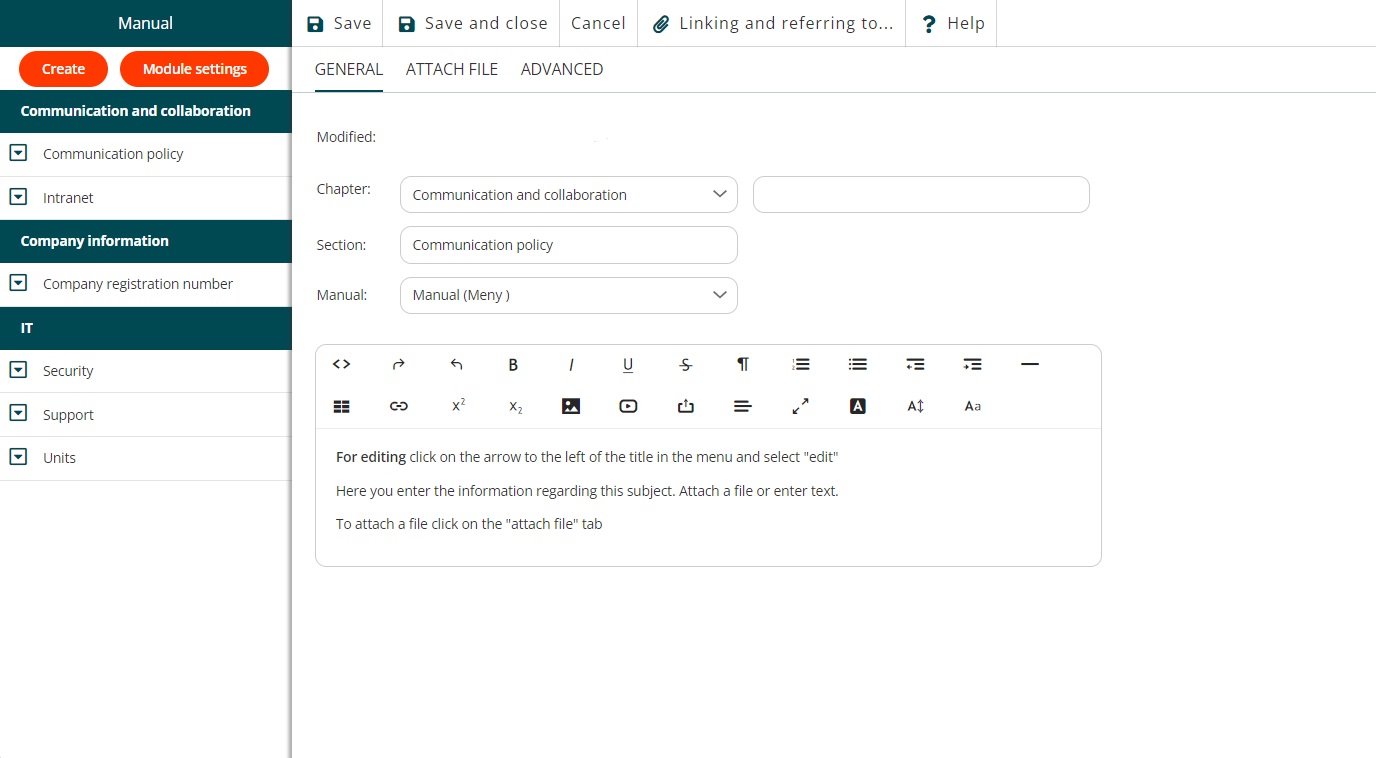
Create a new manual section
1. Click the Create button at the top of the table of contents.
2. A manual section form opens in edit mode in the manual's right frame.
3. Fill in the specified fields for chapters and sections under the General tab. In the text field below, enter the content for the handbook section.
4. If you want to attach a file to the manual section, do so under the Attach File tab.
5. Under the Advanced tab, choose how you want the content to open:
- Text (such as an information page with text and image).
- Link (specified link to external web page opens in the right frame of the manual).
- Attached file (the post's attached file opens directly in the right frame of the manual or in the appropriate program, depending on the file format).
5. Click Save and Close.
Author: Mark Komarov
Last update: 2024-01-04 14:11
General » Page
About Page
There can be one or more pages in a portal. A page is an information page that can consist of both text and images.
Here's how to create a new Page:
- Open the administrative view by clicking Admin at the top of the portal's main menu.
- Click Create in the admin menu.
- Select Page.
- The module settings are opened for the selected module.
- Fill in the name (menu text) and select a location in the left menu for the module, make the settings that are current and decide which authorization groups should have access to the module.
- Click Save and Close.

Author: Mark Komarov
Last update: 2024-01-04 14:17
General » Directory
About Directory
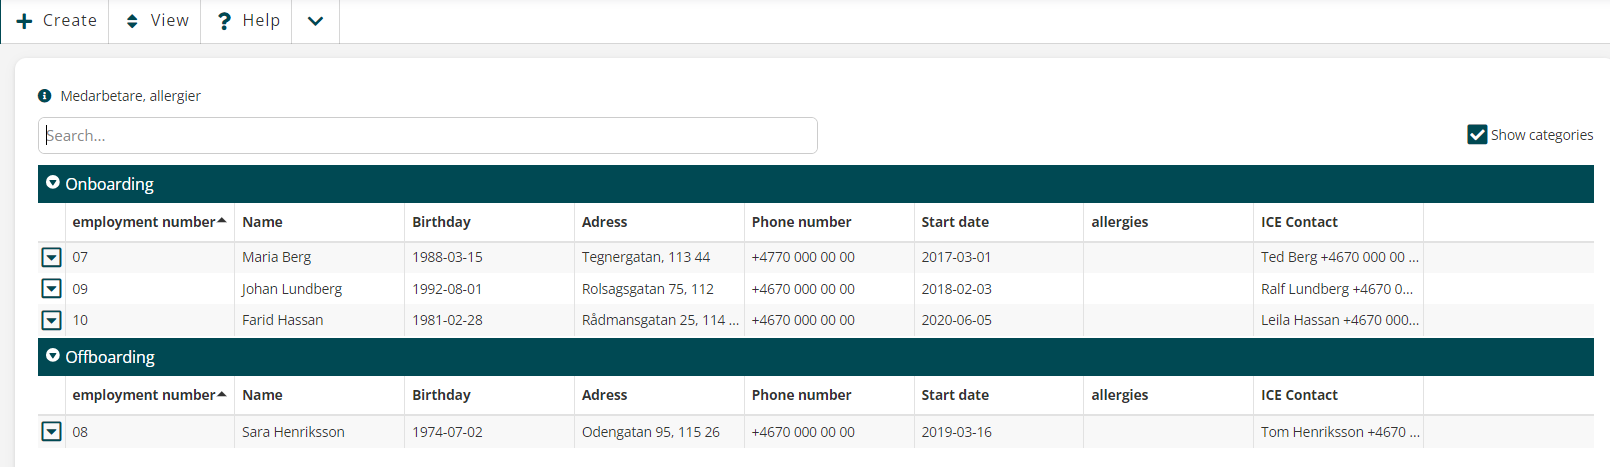
With Directory in TeamEngine, you can collect and structure different types of data.
All fields in a directory are adapted by the Portal administrator for each portal. This means that the appearance and properties of the Directory can vary between different directories. The Directory can contain from one to ten columns, which means that each Directory entry can contain a maximum of ten different types of information. The administrative settings for the Directory are made by the Portal administrator.
You can:
- Structure different types of data.
- Collect important contact information.
- Import or export data from e.g. an Excel file.
- Categorize registry entries.
- Filter registry entries.
Author: Mark Komarov
Last update: 2024-01-04 14:48
Delete directory entry
1. Click the context menu to the left of the directory entry.
2. Select Delete.
3. A dialog box will open with a verification question if you really want to delete the current directory entry.
4. Click the OK button.
The directory entry is deleted from the Directory.
Author: Mark Komarov
Last update: 2023-11-24 10:14
Edit a directory entry
1. Click on the left column of the current directory entry to open it.
2. Click on the menu option Action and select Edit.
3. The directory entry opens in edit mode in a new window.
Or:
1. Click the context menu to the left of the directory entry.
2. Select Edit.
3. The directory entry opens in edit mode in a new window.
Author: Mark Komarov
Last update: 2023-11-24 10:19
Create a new directory entry
1. Go to Create in the module menu.
2. Select Entry, the name can be customized in Module settings
3. A directory entry form opens in a separate window in edit mode.
4. Fill in the specified fields under the General tab. The fields can be of the following type:
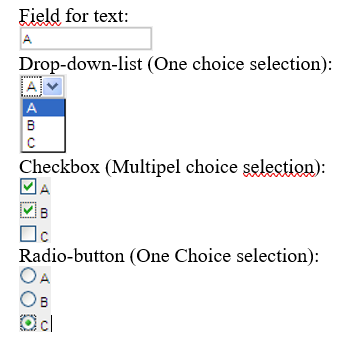
5. If a description of the directory entry is necessary or needs to be more detailed, you can fill in additional text in the text field. Note! The portal administrator may have removed the ability to add text to the text field.
6. If you want to attach a file to the directory entry, do so under the Attach File tab. Note! The Portal administrator may have removed the ability to attach file to the directory entry.
7. If you subscribe to files/folders associated with this registry entry, click Add under the "Subscribe to:"
8. Click Save and Close.
Author: Mark Komarov
Last update: 2024-01-04 14:57
Insider Manager » Schedule email
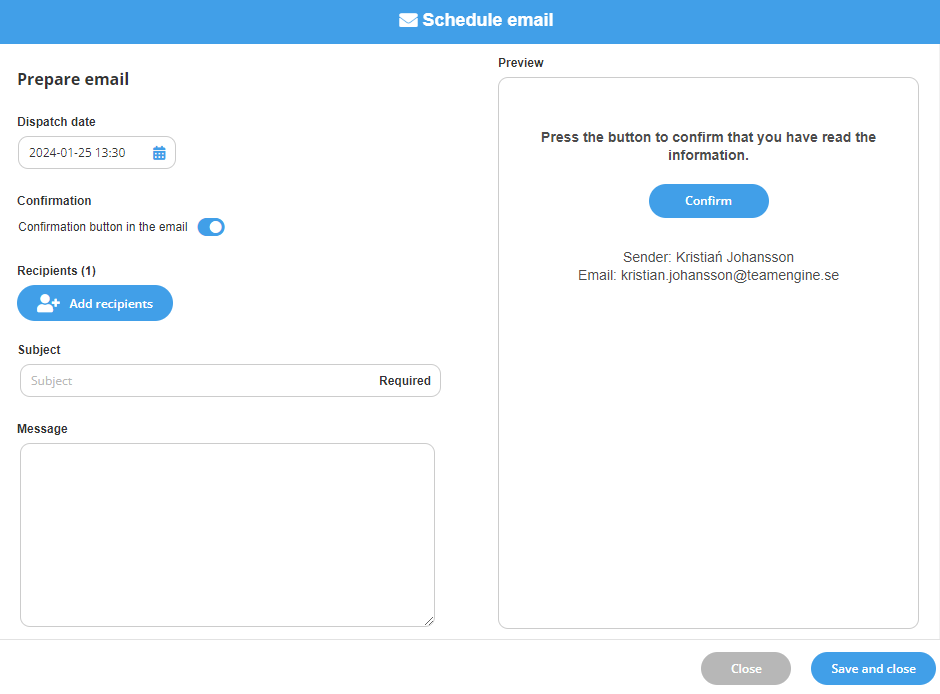
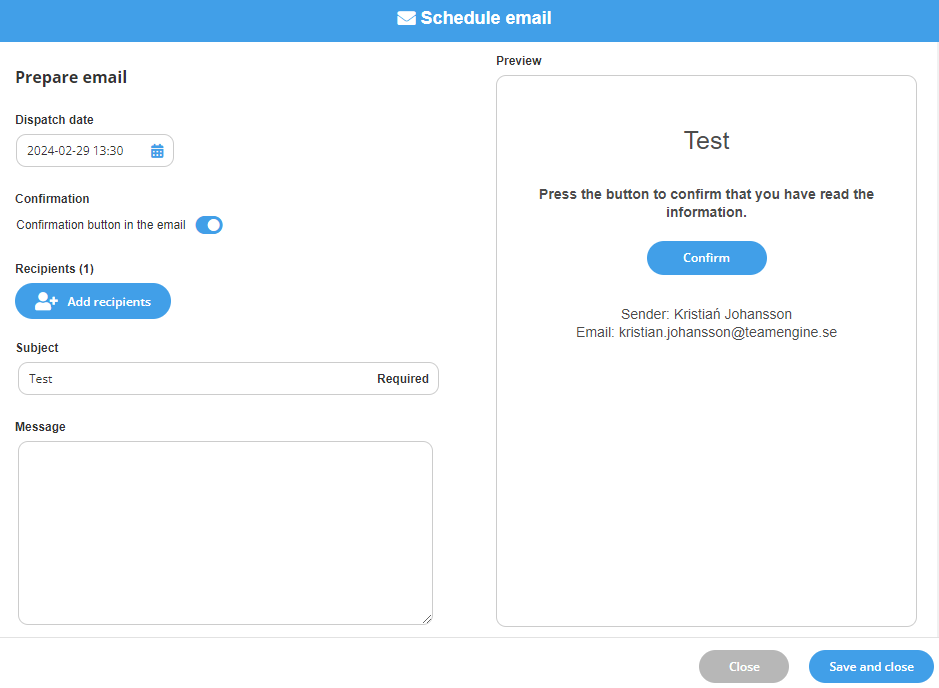
Create Schedule email
To create a schedule email, start by opening the Insider List module in the left-hand menu.
- Hover over Create at the very top and select Schedule email. The button may have a different name if this has been set under Module Settings.
- Add a Dispatch date and time for when the email should be sent.
- Choose if the email should contain a button to confirm that the recipient has read the content.
- Click on Add Recipients to select the individuals to send the email to. It is possible to choose from among the individuals found under the Insiders tab in your Insider Manager.
- Enter the Subject and Message for the actual email to be sent. You can also see how the email will look in the Preview section.
- Click on Save and close. The email saves and will be sent on the date and time selected.
Author: Kristian Johansson
Last update: 2023-12-21 13:36
Edit Schedule email
You can edit scheduled emails in two ways:
- Click on the subject of the email. The email opens in reading mode in a new window.
- Click on the menu option Edit.
- The email opens in edit mode.
Or:
- Click on the quick menu to the left of the email.
- Select Edit.
- The email opens in edit mode.
Author: Kristian Johansson
Last update: 2023-12-21 13:44
Delete Schedule email
Here's how to delete a Scheduled email:
- Click on the quick menu to the left of the email.
- Select Delete.
- A dialog box opens with a verification question if you really want to delete the current email.
- Click the OK button.
- The email is deleted from your Insider Manager.
Author: Kristian Johansson
Last update: 2023-12-21 13:47
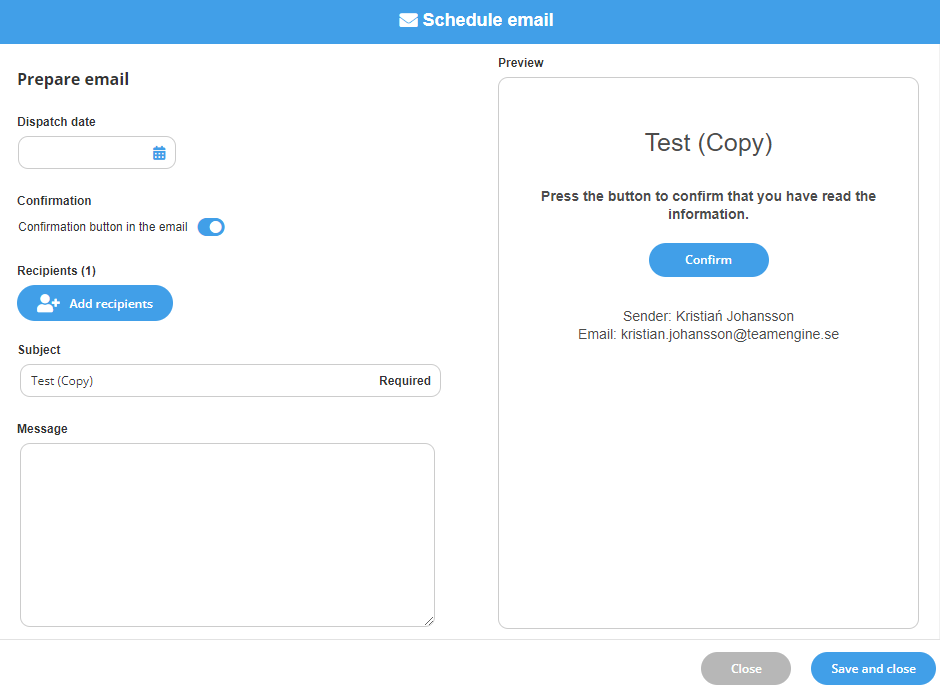
Copy Schedule email
Here's how to copy a Scheduled email:
- Go to the Schedule emails tab in your Insider Manager
- Click on the quick menu to the left of the email you want to copy.
- Select Copy.
- The email will now open in editing mode and you can set the date and time for when it should be sent.
- Once you have made your changes, you can click Save and close.
Author: Kristian Johansson
Last update: 2023-12-21 13:51
Send reminder to confirm
If you have chosen for the recipients of the email to confirm that they have done so, it is also possible to send out reminders to these individuals.
You can send reminders in two ways:
- Click on the quick menu to the left of the email.
- Select Send reminder.
- A dialog box opens to confirm that you want to send a reminder, select Send.
- A reminder is sent to all the recipients who had not confirmed.
Or:
- Click on the subject of the email.The email opens in a new window.
- Click the Recipients tab.
- Click on the quick menu to the left of the recipient's name
- Select Send reminder
- A dialog box opens to confirm that you want to send a reminder, select Send.
- A reminder is sent to that particular recipient
Author: Kristian Johansson
Last update: 2023-12-21 15:50
General » Lobby
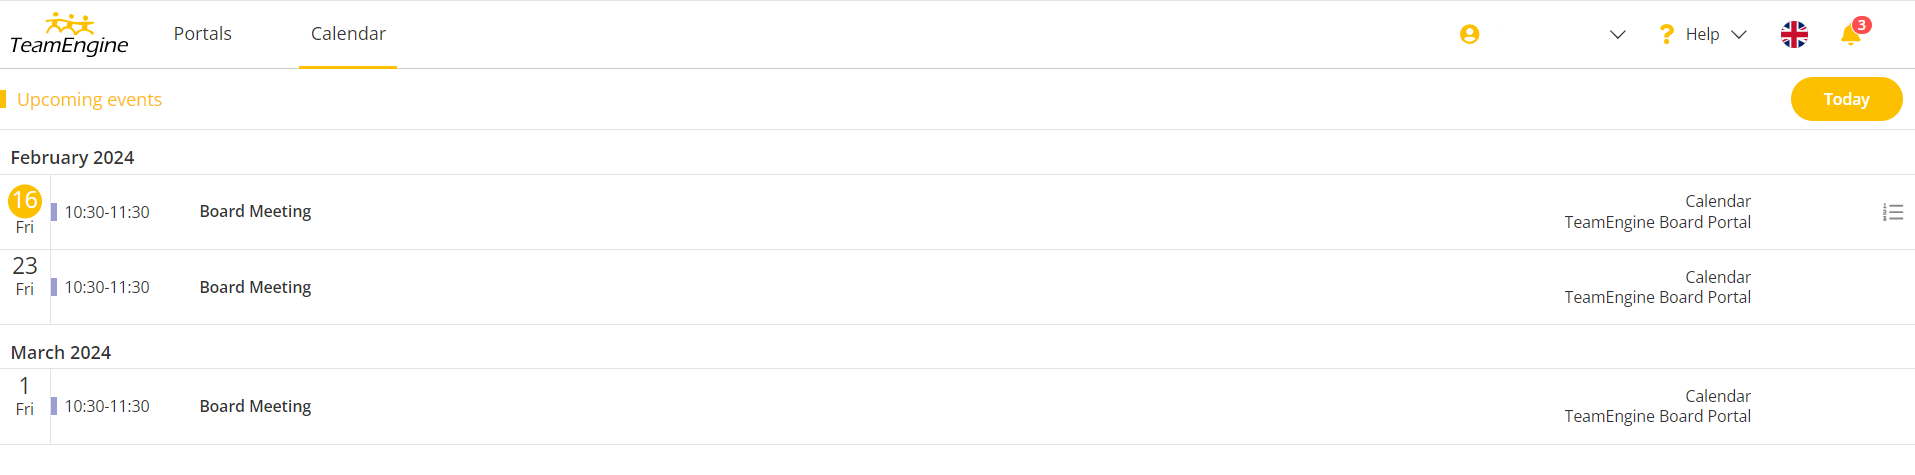
About Lobby
The Lobby has undergone a significant upgrade that will improve your user experience.
When you log in to TeamEngine, you come to the Lobby (formerly My Portals). Here you get an overview of what awaits you in the portal. You can easily navigate to a meeting or sign a document directly from the Lobby.
Tap the icons to open up the menu to see what you need to sign or which meeting you need to accept.
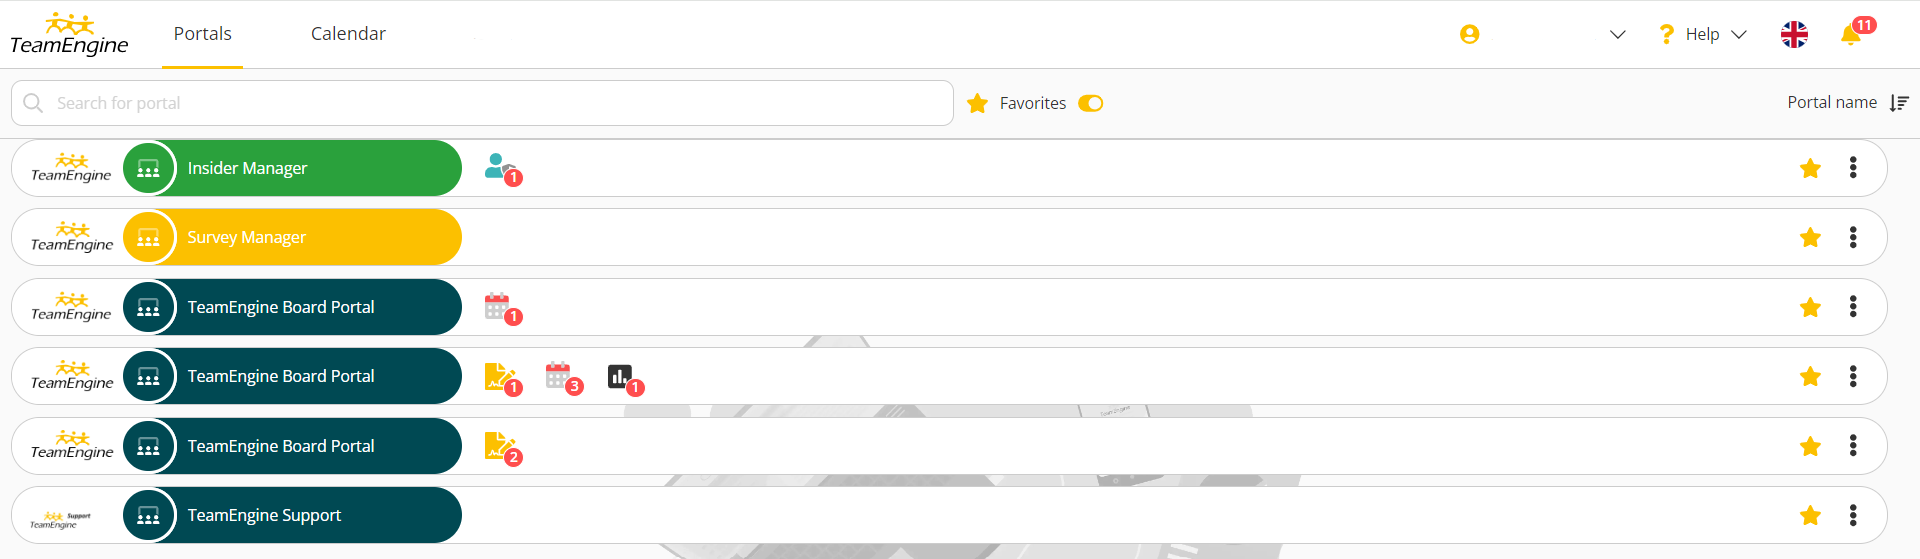
The lobby also offers an overview of all meetings you have been invited to. Tap the Calendar tab to get there.
Author: Mark Komarov
Last update: 2024-02-16 14:22
General » Send Link / Notify
Send link / Notify
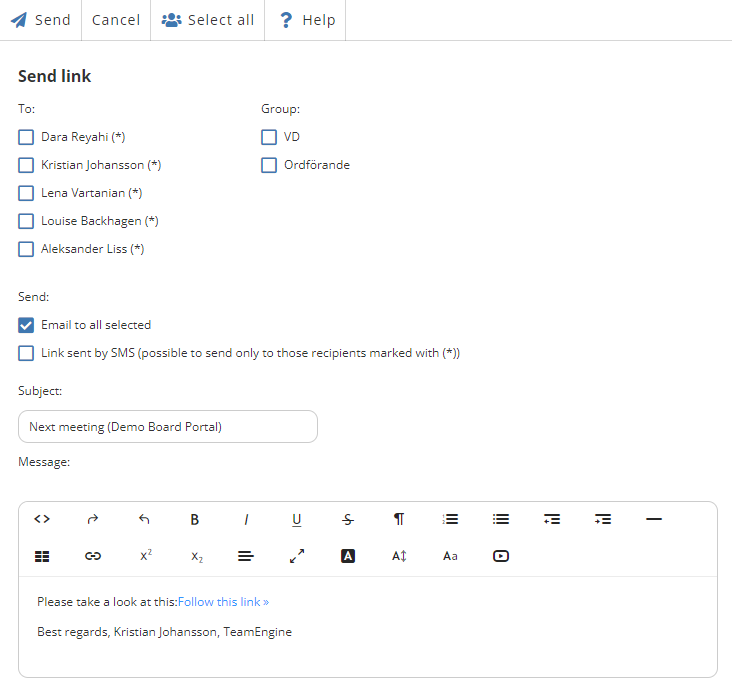
In TeamEngine there is a function called Send Link that can be used to notify members when there is something in the portal that you want them to look at. It is possible to send a link to basically everything in the portal. For example, you can send a link to a meeting in the calendar, to an individual document or to a module. When you use the function, you can choose whether the message should be sent via email and/or SMS, it will then also appear as a notification inside the portal so that members can quickly see what they need to do. Those who have our app installed will also receive a so-called push notification to their phone/tablet.
There are several ways to send a link:
- If you want to send a link to a specific document, click the quick menu
 to the left of the document and select Send Link.
- To send a link to a meeting in the calendar, you can find Send link in the top menu.
- You can also send a link to a specific module and then you will find Send link directly in the top menu or under the arrow to the right of the various options.
Once you have clicked on Send link, you can choose which individuals or groups the message should be sent to. (Only those who have access to the module from which you send the link are selectable)
You can then choose how the message should be sent and change the subject and the message itself. To send the message, click Send.
Author: Kristian Johansson
Last update: 2024-02-26 14:37


